
I used to be the person who loved taking pictures of friends and family, but honestly, most of my early photos were awkward — stiff poses, forced smiles, and backgrounds that distracted more than they added. I thought portrait photography was just about pointing and clicking, but I quickly learned it’s so much more than that.
Table of Contents
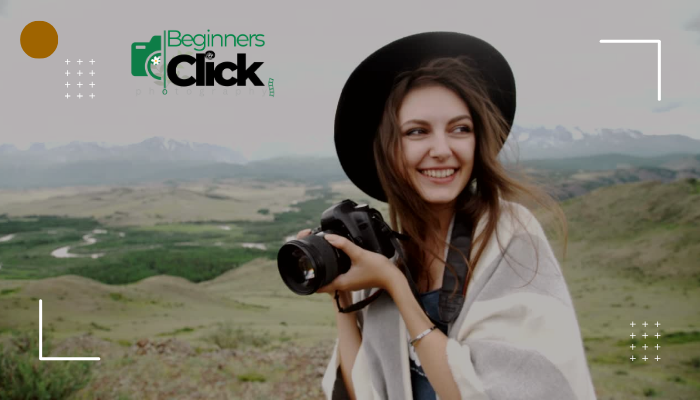
ToggleBeginner's Guide to Portrait Photography: Capture Stunning, Genuine Moments
It’s about freezing real moments, capturing the personality behind the smile, and telling a story through your images. And trust me, I made plenty of mistakes along the way — blurry shots, bad lighting, missed focus — but each mistake was a lesson that helped me grow.
Your Journey to Capturing Real Stories
This guide is for anyone who wants to move beyond simple snapshots and create portraits that feel alive and authentic. I’ll share easy tips to help you connect with your subject so they feel relaxed and natural, ways to use light creatively — like flattering natural window light — and how to use your camera settings to achieve that beautiful blurred background we all love.
With a bit of practice, patience, and these simple techniques, you’ll soon be capturing genuine moments that tell stories and create lasting memories.
Why Do People Love Portrait Photography?
Portrait photography is more than just snapping pictures of faces — it’s a powerful way to capture stories, emotions, and the essence of a person. Here’s why many of us fall in love with this beautiful art form:
1. It Captures Real Emotion
There’s something magical about freezing a genuine smile, a thoughtful gaze, or a burst of laughter forever in a frame. Portraits let you hold onto moments of joy, vulnerability, and everything in between — moments that tell the story beyond words.
I remember photographing a shy friend who never smiled much. One day, after chatting and making her comfortable, I captured a candid smile that lit up her entire face. That single photo spoke volumes and reminded me why I love portraits.

2. It Builds a Connection
Shooting portraits is about more than just the camera — it’s about connecting with your subject. You get to know their personality, hear their stories, and share a moment of trust. That connection makes the photos come alive.
3. It’s a Creative Journey
Portrait photography challenges you to think about light, composition, mood, and storytelling. Every person is unique, and every photo is a chance to express your vision and creativity.
4. It Preserves Memories
Portraits become timeless keepsakes for families and individuals. They hold memories, relationships, and moments that last across generations. Being able to create those keepsakes is incredibly fulfilling.
5. It Makes You See the World Differently
When you start looking for portraits, you begin noticing the little things — the way light falls on a face, the sparkle in someone’s eye, or the way a person’s personality shines through their expression. It makes photography, and life itself, richer.
In Short
People love portrait photography because it’s personal, emotional, and creative — a way to tell stories through faces and moments. It’s not just about pictures; it’s about capturing souls.

What Are the Different Types of Portrait Photography?
Portrait photography is a vast world filled with many exciting styles. Each type lets you tell a unique story and capture different aspects of personality, mood, and connection. Let me take you through some of the most popular and rewarding types — with a bit of my own experience sprinkled in!

1. Traditional Portraits
Traditional portraits are what most people imagine when they think of portrait photography — posed, polished, and often taken in a studio or a controlled environment. I remember my first studio session; I was nervous about posing and lighting, but the magic of perfect light wrapping the subject’s face and the crisp focus made me fall in love instantly.
These portraits focus on clean, flattering light and clear details, usually from the waist up or as a classic headshot. They’re great for professional profiles, family keepsakes, or formal occasions.

Camera Setup:
- Camera: Full-frame DSLR or mirrorless camera for best image quality and dynamic range.
- Lens: 85mm f/1.8 or 50mm f/1.4 prime lens (great for flattering compression and creamy bokeh).
- Settings: Aperture between f/1.8 to f/4 for sharp subject and blurred background; ISO 100-400; shutter speed 1/125s or faster.
2. Environmental Portraits

One of my favorite discoveries was environmental portraits. Instead of isolating the subject, you capture them in their own world — maybe their cozy living room, an artist’s vibrant studio, or a farmer’s sunlit field. This style tells a story beyond just the person — it shows where they come from, what they do, and what matters to them.
I once photographed a local potter right in her workshop, covered in clay and completely in her element. The photo didn’t just capture her face but her passion, tools, and the earthiness of her craft. It was like freezing her whole world in one frame.
Camera Setup:
- Camera: APS-C or full-frame DSLR/mirrorless with good low-light performance.
- Lens: 24-70mm f/2.8 zoom lens for versatility in tight spaces and varying compositions.
- Settings: Aperture f/4–f/8 for deeper depth of field to include environment; ISO adjusted based on lighting; shutter speed minimum 1/60s.
3. Candid Portraits
Candid portraits are all about capturing those unguarded moments — the genuine smiles, laughter, or even the quiet introspection. When I started, I thought portraits had to be posed, but candid shots taught me otherwise.
I recall a family gathering where I just started clicking without telling anyone — the result was a series of natural expressions and interactions that felt honest and alive. The key is to blend into the background and wait for the moment to unfold.

Camera Setup:
- Camera: Any DSLR or mirrorless with fast and accurate autofocus.
- Lens: 35mm or 50mm prime lens with wide aperture (f/1.4–f/2.8) to capture sharp subjects in low light and create natural bokeh.
- Settings: Aperture wide for low light and background blur; ISO 400–1600 depending on ambient light; shutter speed 1/250s or faster to freeze motion.
Want better bokeh in your candid shots? Learn how aperture settings help you blur the background beautifully.
4. Lifestyle Portraits
Lifestyle portraits are like a mix between candid and posed, showing people naturally interacting in their daily life. This style lets your subjects be themselves, whether they’re reading, cooking, or playing with their kids.
I once shot a couple cooking breakfast together. They weren’t posing but just enjoying the moment. That relaxed atmosphere came through in every shot, telling a story of love, comfort, and everyday joy.

Camera Setup:
- Camera: Mirrorless or DSLR with good dynamic range.
- Lens: 24-70mm f/2.8 zoom for flexibility in framing candid moments.
- Settings: Aperture f/3.5–f/5.6 for moderate depth of field; ISO 200–800 depending on lighting; shutter speed 1/125s or higher.
5. Glamour and Fashion Portraits

Fashion and glamour photography are a whole different world — focused on style, beauty, and expression. I remember my first time on a fashion shoot, overwhelmed by makeup artists, stylists, and dramatic lighting setups.
These portraits aim to create striking, artistic images, playing with bold poses, makeup, and dramatic lighting. It’s about creating an idealized vision and expressing personality through style.
Camera Setup:
- Camera: Full-frame camera with excellent resolution and color depth.
- Lens: 85mm f/1.4 or 70-200mm f/2.8 zoom for compression and versatility.
- Settings: Aperture f/1.4–f/2.8 for shallow depth of field; ISO 100-400; shutter speed 1/200s or faster.
6. Self-Portraits
Taking photos of yourself — or selfies with a purpose — can be a powerful creative tool. I used to shy away from self-portraits, but once I tried, it became a way to experiment fearlessly with light, angles, and concepts.
It’s your chance to tell your own story without filters, capture raw emotions, or try something artistic only you can imagine.

Camera Setup:
- Camera: Any camera with a good flip screen or remote control.
- Lens: 35mm or 50mm prime lens.
- Settings: Aperture f/2–f/5.6 depending on light; ISO 100-800; shutter speed 1/125s.
If you’re shooting indoors or in low light, understanding how ISO works is essential to keep your self-portraits sharp without too much grain. Read our guide on ISO settings for low-light photography to get it right.
7. Fine Art Portraits

Fine art portraits go beyond realism and technicality. These images evoke deeper emotions and stories, often using creative lighting, composition, or post-processing.
I once created a series inspired by dreams and memories, using soft light and shadows to add mystery. It was less about the subject’s face and more about mood and feeling — a different, more poetic way of storytelling.
Camera Setup:
- Camera: Full-frame DSLR or mirrorless with manual mode capabilities.
- Lens: 85mm or 50mm prime lens with wide aperture.
- Settings: Aperture and shutter speed vary widely; ISO kept low for best quality; lighting often carefully controlled.
8. Boudoir Portraits
Boudoir photography is intimate and empowering, focusing on sensuality, confidence, and personal expression. When I first explored boudoir, I realized it’s not just about revealing clothes but about revealing strength, beauty, and personality.
Creating a safe, comfortable space for the subject is key — gentle guidance, warm lighting, and a respectful approach make the difference between a photo and a powerful portrait.

Camera Setup:
- Camera: Full-frame mirrorless or DSLR with excellent low-light performance.
- Lens: Fast prime lens like 50mm f/1.4 or 85mm f/1.8 for smooth bokeh.
- Settings: Aperture f/1.4–f/2.8; ISO 400-1600 depending on lighting; shutter speed 1/125s or faster.
9. Family or Group Portraits

Capturing groups or families brings a whole new set of challenges and joys. I remember shooting a large family reunion — coordinating smiles, poses, and moments was hectic, but the final photos were priceless.
The focus here is on relationships and interactions — sometimes candid moments between family members say more than perfect poses ever could.
Camera Setup:
- Camera: Any DSLR or mirrorless with reliable autofocus.
- Lens: 24-70mm f/2.8 zoom or 35mm f/1.8 prime for versatility.
- Settings: Aperture f/5.6–f/8 for deeper depth of field; ISO 100-400; shutter speed 1/200s or faster.
10. Close-Up Portraits
Close-ups zoom into the details — the eyes, the smile lines, the freckles — telling stories through tiny textures and expressions. I love how close-ups reveal character.
During one shoot, I focused solely on the eyes of my subject, and the emotion in that shot was incredible. It’s a reminder that sometimes, less is more, and details hold the deepest stories.

Camera Setup:
- Camera: Any DSLR or mirrorless with macro or portrait lens.
- Lens: Macro lens or 85mm prime.
- Settings: Aperture f/1.8–f/2.8 for shallow depth; ISO 100-400; shutter speed 1/125s or faster.
Why Explore Different Types?
Trying different portrait styles lets you find your own voice, build a versatile portfolio, and connect with subjects in diverse ways. Whether you love the intimacy of boudoir, the storytelling of environmental portraits, or the elegance of traditional shots, each type teaches you something new and exciting.
Ready to dive deeper into any of these styles? Let me know — I can help you master them one by one!
General Tips:
Building Real Connections: The Heart of Every Portrait
When I first started shooting portraits, I’d rush into taking photos without even talking much to my subject. The result? Forced smiles, stiff poses, and that uncomfortable tension you can almost feel through the photo. One afternoon, I changed my approach: I spent 5-10 minutes simply chatting, sharing jokes, and listening to stories before clicking a single shot. The difference was incredible — relaxed, natural expressions that truly told a story.
Camera tip: Use a wide aperture like f/2.8 or f/1.8 during this time to softly blur distracting backgrounds and keep the focus on those genuine expressions. Also, try using Continuous AF (AF-C) mode to keep focus on your subject’s eyes as they move naturally.

Lighting is King: How I Learned to Paint with Light

My first few portraits were taken under the harsh midday sun — think blown-out highlights and deep, unflattering shadows right across the face. Subjects squinting, shadows cutting their features in half. Frustrating, to say the least. I soon learned to seek out soft natural light — like near a window on a cloudy day or during the golden hour — where light gently wraps around my subject’s face, adding warmth and texture without harsh shadows.
Camera tip: When shooting indoors near a window, try setting your aperture wide (f/1.8–f/3.5) to maximize light intake and create a lovely background blur. Use a moderate ISO (around 400) to avoid noise, and keep shutter speed around 1/125s or faster to avoid motion blur.
If shooting outside in harsh light, use a reflector or position your subject in shade to soften the light. You can also experiment with off-camera flash or diffusers for more control.
Background Matters: From Busy Clutter to Clean Focus
I once shot in a bustling city park where the background was a chaotic mix of people, benches, and trash bins. Despite my subject posing nicely, the distracting background ruined the frame. The solution? I switched to a wide aperture (f/2.8 or lower) to blur the background beautifully. Suddenly, my subject popped out, crisp and clear, while the background melted into a soft, dreamy canvas.
Camera tip: Use a lens with a wide maximum aperture (like a 50mm f/1.8) and get as close to your subject as possible to increase background blur. Keep your shutter speed fast enough (1/200s or more) to avoid shake, and adjust ISO to balance exposure.

Choose backgrounds that complement your subject’s colors and mood — simple walls, nature scenes, or open skies work wonders.
Want to understand how background blur actually works? Read our guide to depth of field in photography — it’s the secret behind that soft, dreamy look.
Focus on the Eyes: Capturing the Soul of Your Subject

A photographer I deeply admire once told me, “If the eyes aren’t sharp, the whole photo falls flat.” Early in my journey, I missed this crucial detail, and many of my photos felt lifeless. Now, focusing on the eyes is my non-negotiable rule. They are the window to the soul, pulling viewers into the emotion and story behind the portrait.
Camera tip: Use single-point autofocus and place the focus point directly over the subject’s eye. If your camera has eye-detection AF, turn it on — it’s a game-changer. Shoot with a wide aperture to soften the rest of the face and background, but keep the eyes razor-sharp.
When shooting with manual focus, zoom in on the eyes on your live view screen and fine-tune focus before taking the shot.
Wrapping Up
Building rapport, mastering light, choosing the right background, and locking focus on the eyes — these fundamentals transformed my portrait photography from bland snapshots to compelling stories. Each tip connects to the next, creating a seamless experience both for you and your subject.
Try experimenting with these tips on your next shoot. Capture the real, the raw, and the beautiful — your photos will thank you.
Technical Tips: How I Upgraded My Portrait Game
Lens Choice: The 50mm Game-Changer
When I first started portrait photography, I was using the standard kit lens that came with my camera. It was okay for snapshots, but I quickly noticed my portraits lacked that smooth, creamy background blur — the kind that really makes your subject pop. After some research, I invested in a 50mm prime lens, and wow — everything changed. Suddenly, my portraits looked professional, with gorgeous bokeh and crisp details.
Prime lenses, especially the 50mm, are favorites among portrait photographers because they have a fixed focal length, tend to be faster (meaning they have wider maximum apertures like f/1.8), and produce a much more pleasing background blur. If you’re starting out, this lens is a perfect choice.

Camera Settings: Mastering the Exposure Triangle

I spent weeks just experimenting with aperture settings, trying to get that perfect background blur while keeping my subject sharp. Slowly, I learned how aperture, shutter speed, and ISO work together in the Exposure Triangle to control not only the depth of field but also the brightness and noise in my images.
For portraits, a wider aperture (a smaller f-number like f/1.8 or f/2.8) is ideal to achieve that signature blurred background that isolates your subject beautifully.
Practical Tip: Start by setting your camera to Aperture Priority (Av or A mode) and experiment with different aperture values to see their effect on depth of field and exposure.
Angles and Posing: Finding Your Style
Early on, I took most portraits at eye level — and frankly, they felt a bit flat. That’s when I started experimenting with angles to add variety and emotion. Shooting from above can slim a subject’s face and create a gentle, approachable look. Shooting from below adds drama and power.
Guiding your subject with gentle posing suggestions makes a huge difference. I learned to communicate in a relaxed way — asking simple things like, “Tilt your chin up a bit” or “Look slightly to the side” — and the natural, flattering expressions that followed made my portraits much more engaging.

Try mixing these up:
Eye level for connection
High angle for softness
Low angle for drama
Technical Mastery Meets Creative Vision
Mastering these technical tips — choosing the right lens, understanding your camera settings, and experimenting with angles — doesn’t just improve your photos technically, it unlocks your creative vision. When you control the technical side, your storytelling through portraits becomes stronger and more personal.

Learning Resources: How I Leveled Up My Portrait Skills

Online Tutorials: Learning from the Pros
When I first started, YouTube was my best friend. I spent hours watching photographers break down lighting setups, posing tips, and camera settings. Channels like [insert popular channel names] helped me avoid common beginner mistakes and gave me the confidence to try new techniques.
There are plenty of free and paid tutorials online covering every aspect of portrait photography. Whether it’s mastering natural light or learning creative posing, these resources are invaluable for fast learning.
Books and Magazines: Inspiration on Paper
I also found immense inspiration in photography books and magazines. Reading about the experiences and techniques of renowned portrait photographers gave me fresh ideas and pushed me to experiment more creatively.
If you’re serious about improving, invest in a few good photography books or subscribe to photography magazines. They’re treasure troves of professional knowledge, trends, and stunning visuals.
Practice, Practice, Practice: The Secret Sauce
My biggest breakthroughs came from simply shooting every day — be it friends, family, strangers, pets, or even my morning coffee mug. Every session was a lesson; every mistake, a step forward.
Don’t be afraid to experiment. Try different lighting, angles, and settings. The more you shoot, the more intuitive your understanding of portrait photography will become.
Remember:
here’s no shortcut — consistent practice is the key to transforming your skills from average to outstanding.
Additional Ideas to Boost Your Portrait Photography Journey:

Take a Portrait Photography Class
When I was stuck figuring out the basics, joining a portrait photography class was a game-changer. It gave me structured guidance, hands-on practice, and instant feedback from professionals — something you just can’t get from books or videos alone. If you’re serious about improving, a class can fast-track your progress.
Join a Photography Club or Online Forum
One of the best ways I grew as a photographer was by joining local photography clubs and online forums. Sharing my work, getting constructive critiques, and learning from others’ experiences helped me see my mistakes and discover new techniques. Plus, connecting with fellow photographers keeps the motivation alive!
Study the Masters: Emulate and Innovate
I spent hours looking at portraits by photographers I admired, from classic legends to modern creatives. Trying to understand their lighting, composition, and posing inspired me to experiment with my own style. Don’t just copy — use their work as a launching pad to create your unique voice behind the camera.
Pro Tip:
Keep a mood board or inspiration folder with your favorite portraits. Refer back to it before shoots to spark creativity and stay motivated.
What is the Best Camera for Portrait Photography?
Choosing the right camera for portrait photography depends on your budget, style, and level of expertise. Here are some of the best cameras highly recommended by professionals and beginners alike for capturing stunning portraits:

1. Canon EOS R6
A full-frame mirrorless camera that balances high-speed performance with excellent image quality. The Canon EOS R6 offers superb autofocus, especially eye-detection AF, which is a game-changer for portraits. With excellent low-light capabilities and beautiful color science, it’s perfect for both amateurs and pros.
- Ideal for: Portrait photographers looking for fast autofocus and great image quality.
- Key features: 20MP sensor, 12fps burst shooting, in-body image stabilization (IBIS), Dual Pixel CMOS AF.

2. Sony A7 III
Sony’s A7 III is a versatile full-frame mirrorless camera known for its outstanding dynamic range and autofocus system. The camera excels at capturing sharp portraits with creamy backgrounds thanks to its high-resolution sensor and wide lens compatibility.
- Ideal for: Photographers who want a robust, all-around camera with excellent portrait capabilities.
- Key features: 24.2MP sensor, 10fps continuous shooting, excellent eye AF, 5-axis IBIS.

3. Nikon Z6 II
The Nikon Z6 II offers a powerful combination of image quality, speed, and ergonomics. It features an impressive autofocus system with eye and face detection that works well for portraiture, plus great color rendering.
- Ideal for: Nikon users upgrading to mirrorless or those seeking superb image detail and handling.
- Key features: 24.5MP sensor, 14fps burst, dual processors, in-body stabilization.

4. Fujifilm X-T4
A crop-sensor mirrorless camera loved for its film-like color profiles and tactile controls. The X-T4 is great for portrait photographers who want vibrant skin tones and artistic flexibility without going full-frame.
- Ideal for: Photographers on a budget or who love Fujifilm’s unique color science.
- Key features: 26MP APS-C sensor, 15fps burst, in-body stabilization, excellent JPEG output.

5. Canon EOS 5D Mark IV
A legendary DSLR known for its reliability and beautiful image quality, the 5D Mark IV remains a top choice for many portrait professionals. Its full-frame sensor and proven autofocus system make it ideal for studio and outdoor portraits.
- Ideal for: Professionals who prefer DSLRs and need rugged performance.
- Key features: 30.4MP sensor, 7fps burst, Dual Pixel AF, robust build.

How to Choose?
- Full-frame cameras generally offer better background blur and low-light performance.
- Mirrorless cameras have faster autofocus and are lighter, great for event and candid portraits.
- Crop sensors can still deliver excellent portraits with the right lens and technique, often at a lower price.
Pro Tip:
Pair your camera with a fast prime lens like a 50mm f/1.8 or 85mm f/1.4 to get that signature creamy background and sharp subject focus.
Capture More Than Just a Face
Remember, portrait photography is so much more than just snapping a likeness or getting a perfect smile. It’s about capturing the essence of a person — the spark in their eyes, the story behind their smile, the emotions that make them unique.
Every portrait you take is an opportunity to freeze a moment in time — a moment filled with personality, vulnerability, and life.
You don’t need fancy gear or perfect conditions. What you need is curiosity, patience, and a willingness to learn. With these simple tips and a little bit of practice, you’re not just taking pictures — you’re creating art that speaks, connects, and lasts forever.

So grab your camera, get out there, and start telling the stories only you can tell. Every mistake is a step closer to mastery, and every shot is a new chance to see the world — and the people in it — through your unique lens.
Your journey as a portrait photographer has just begun. Let your passion guide you, and your images will inspire others.
Keep shooting. Keep learning. And most importantly, keep seeing the beauty in every face.
Before You Go
Here’s a quick recap of the most important tips we covered today:
– Use a 50mm or 85mm prime lens for soft bokeh
– Shoot during golden hour or near windows for flattering light
– Focus on the eyes — always
– Keep the background clean and complementary
– Guide your subject gently for natural expressions
Frequently Asked Questions (FAQ) about Portrait Photography
1. What camera is best for portrait photography?
Choosing the best camera for portrait photography depends on your budget, experience level, and shooting style. Generally, full-frame cameras are preferred because they offer larger sensors that capture more light, produce higher image quality, and create a natural, creamy background blur known as bokeh — a hallmark of beautiful portraits.
Popular full-frame models like the Canon EOS R6, Sony A7 III, and Nikon Z6 II are favorites among portrait photographers. These cameras boast excellent autofocus systems, impressive low-light performance, and great dynamic range, helping you capture sharp, vibrant portraits in various lighting conditions.
However, crop sensor cameras are also excellent options, especially for beginners or those on a budget. Cameras like the Fujifilm X-T4 or Canon EOS M50 paired with fast prime lenses (like a 50mm f/1.8) can deliver stunning portraits with nice background separation. Crop sensors provide a natural “zoom” effect, which can be useful for portraits.
Ultimately, the best camera is one that feels comfortable in your hands and suits your needs. Investing in a good lens and learning to use natural light effectively often matters more than having the most expensive body. So focus on mastering your gear, whatever it is, and your portraits will improve dramatically.
2. Which lens should I use for portraits?
When it comes to portrait photography, the lens you choose plays a crucial role in how your images turn out. Generally, prime lenses with focal lengths between 50mm and 85mm are considered ideal for flattering portraits. These lenses offer a natural perspective without distortion, helping to capture your subject’s features beautifully.
One of the key benefits of prime lenses is their wide maximum aperture, often ranging from f/1.2 to f/2.8. A wide aperture lets in more light, which allows for faster shutter speeds and better low-light performance. More importantly, it helps create that desirable creamy, smooth background blur known as bokeh, which makes your subject stand out sharply against a soft, pleasing backdrop.
For beginners, the 50mm f/1.8 lens is a popular choice because it’s both affordable and versatile. It offers excellent image quality and beautiful bokeh without breaking the bank. If your budget allows, stepping up to an 85mm f/1.8 or f/1.4 lens provides even more flattering compression and background separation, ideal for classic headshots and portraits.
Remember, pairing the right lens with your camera and mastering aperture control will dramatically improve the quality and impact of your portraits.
3. What aperture is best for portrait photography?
Aperture is one of the most important settings in portrait photography because it controls both how much light enters your camera and how much of your image is in focus — what photographers call depth of field.
For classic portraits where you want to isolate your subject and create a beautiful, soft background blur (bokeh), a wide aperture between f/1.8 and f/2.8 is ideal. This shallow depth of field draws the viewer’s attention to your subject’s face by making the background smoothly blurred and less distracting. It’s perfect for headshots, close-ups, and artistic portraits.
However, when you’re photographing groups or want to include more of the environment in your shot, a smaller aperture like f/5.6 to f/8 works better. This increases the depth of field, keeping more elements in focus — ensuring everyone in the group and the surroundings are sharp and clear.
Remember, wider apertures allow more light in, so you might need to adjust your shutter speed or ISO accordingly. Also, using wide apertures requires careful focus, especially on the eyes, to make sure your subject remains sharp.
Experimenting with aperture settings will help you find the perfect balance for your style and shooting conditions.
4. How important is lighting in portrait photography?
Lighting is absolutely essential in portrait photography — it can make or break your image. Good lighting highlights your subject’s best features, creates mood, and adds depth and dimension to your photos.
One of the easiest and most flattering light sources is soft natural light, such as the gentle glow coming through a window or the warm, golden hues during the golden hour (shortly after sunrise or before sunset). I remember my early portraits taken in harsh midday sun — the shadows were sharp and unflattering, making my subjects squint and creating uneven highlights. Switching to soft window light transformed my work overnight.
To control natural light further, photographers often use reflectors to bounce light back onto shadowed areas of the face, creating a more balanced exposure. Similarly, diffusers help soften harsh sunlight, reducing contrast and preventing squinty eyes.
For more control, many photographers use studio lights — strobes or continuous lights — to sculpt the face and create dramatic effects. Learning to shape light using modifiers like softboxes or umbrellas can elevate your portraits to a professional level.
Ultimately, mastering light is key to creating portraits that feel alive, dimensional, and captivating.
5. How do I make my subject feel comfortable during a shoot?
One of the biggest challenges in portrait photography isn’t technical — it’s creating a space where your subject feels relaxed and natural. When people are tense or nervous, it shows in their expressions and body language, and that can make even the best camera work fall flat.
The key is building rapport. I’ve learned that spending just a few minutes chatting before the shoot works wonders. Ask about their day, share a light joke, or talk about something they’re passionate about. This simple connection breaks down walls and helps them forget the camera is there.
Encouraging natural interaction is also important. Rather than asking for stiff poses, try giving gentle directions and letting the subject move and express themselves. Compliment them genuinely and keep the mood light — your positive energy reflects in their expressions.
Sometimes, playing music or taking breaks can help loosen things up. Remember, the best portraits come from moments when your subject forgets they’re being photographed and just is.
With patience and empathy, you’ll find your subjects opening up and showing their true selves — and that’s when the magic happens.
6. What camera settings are best for sharp portraits?
Getting sharp portraits starts with the right camera settings. The goal is to keep your subject crisp and in focus while achieving a pleasing background blur that makes your portrait stand out.
Aperture: Use a wide aperture between f/1.8 and f/4. This lets in plenty of light and creates a shallow depth of field, blurring the background nicely so the subject pops. Be careful with very wide apertures (like f/1.4), as the focus plane is extremely thin, so precise focusing on the eyes is crucial.
Shutter Speed: Keep your shutter speed at 1/125 second or faster to prevent motion blur caused by slight movements of your subject or camera shake. If your subject is moving, you may need even faster speeds, like 1/250 or higher.
ISO: Use a low ISO setting, typically between 100 and 400, to maintain clean images with minimal noise. In low light, you might have to raise ISO to keep the exposure balanced, but be cautious — higher ISO can introduce grain. Modern cameras handle noise better, but try to keep it as low as possible.
Pro tip: Shoot in Aperture Priority mode to control depth of field while the camera adjusts shutter speed, or use Manual mode once you’re confident to balance all settings perfectly.
Struggling with motion blur? Check out our full guide on shutter speed for portraits — learn when to shoot at 1/125, 1/250, and beyond.
7. How can I focus on the eyes?
In portrait photography, the eyes are often called the “window to the soul,” and getting them perfectly sharp is crucial for creating powerful, engaging images. If the eyes aren’t in focus, even the best portrait can feel flat or lifeless.
Most cameras let you choose a single autofocus point—use this to manually position your focus right on the subject’s eye. This ensures the camera locks focus exactly where it matters most.
Modern cameras have taken this a step further with eye-detection autofocus (Eye AF) technology. This feature automatically recognizes and tracks your subject’s eyes, keeping them sharp even if they move slightly. I remember the first time I used Eye AF — it was a game-changer! No more missed focus on blinking or shifting subjects.
If you’re shooting manually, zoom in on your subject’s eye in live view mode and fine-tune focus carefully before taking the shot.
Pro tip: Always focus on the eye closest to the camera, especially in portraits with a shallow depth of field. This helps maintain maximum sharpness on the most important part of your image.
Mastering eye focus will instantly improve the emotional impact and professionalism of your portraits.
8. Can I shoot portraits with natural light only?
Absolutely! Some of the most beautiful and timeless portraits are created using natural light alone. You don’t need expensive studio setups to capture stunning images — just the right use of sunlight and shade.
Window light is one of the easiest and most flattering sources. Position your subject near a large window with soft, diffused light pouring in. This creates gentle shadows and highlights that beautifully sculpt the face. I still remember my first natural light portrait session; the soft glow from the window completely transformed the mood and texture of my images.
Golden hour — the hour just after sunrise or before sunset — offers warm, soft light that adds magic to your portraits. Shooting outdoors during this time means your subject will be bathed in a beautiful, warm glow with naturally soft shadows.
If the sun is harsh, seek shade, like under a tree or next to a building, to avoid strong, unflattering shadows and squinting eyes.
You can also use a reflector to bounce light back onto shadowed areas of your subject’s face, balancing the exposure and adding sparkle to their eyes.
Natural light requires observation and patience, but mastering it will elevate your portraits and bring out natural beauty effortlessly.
9. How do I choose the right background?
Choosing the right background is essential for making your subject stand out and ensuring your portrait tells the right story. A busy or distracting background can steal attention away from your subject, no matter how well you capture their expression.
Keep it simple. Look for backgrounds with plain or softly textured surfaces like walls, fences, or natural settings such as blurred trees or open skies. These create a clean canvas that puts the focus on your subject.
Using a wide aperture (like f/1.8 to f/2.8) helps blur the background beautifully, turning even a busy environment into soft, pleasing shapes called bokeh. This technique isolates your subject, making them pop out of the frame.
Color harmony matters too. Try to select backgrounds that complement your subject’s clothing and skin tone. For example, avoid backgrounds that clash or blend too much with your subject’s outfit, which can cause them to get lost in the photo.
In my early shoots, I learned the hard way that no matter how good the lighting or pose, a distracting background ruins the impact. Now, I scout locations carefully or use shallow depth of field to keep the background subtle and supportive.
10. How can I improve my portrait photography skills?
Improving your portrait photography is a journey — one that’s best traveled with consistent practice and a curious mindset. The more you shoot, the more you understand your camera, your subjects, and how to create compelling images.
Start by photographing friends, family, or even everyday objects around you. Use these sessions to experiment with different lighting setups, angles, and poses without pressure. Every photo, whether it’s perfect or flawed, teaches you something new.
Don’t hesitate to watch tutorials from experienced photographers on platforms like YouTube or enroll in online courses. Seeing how the pros work with light, composition, and editing will inspire you and help you avoid common pitfalls.
Studying the work of great portrait photographers is also invaluable. Observe how they use light, focus, and background to tell a story. Try to emulate their style, then slowly develop your unique voice.
Remember, mistakes are part of the learning process. Every blurry shot or awkward pose is a stepping stone to mastery. Keep pushing your boundaries by trying new techniques and challenging yourself.
Most importantly, be patient and enjoy the process — your style and skills will grow naturally over time as you immerse yourself in the art of portrait photography.

Your perspective on this topic is very interesting. Thanks for the detailed explanation.
Thanks, It will be encouraged me to do more better