Table of Contents
ToggleMastering the Reverse Lens Technique for Stunning Close-Ups
Are you interested in macro photography but don’t have the budget for a macro lens and other equipment? It’s not a big issue for macro photography. When I started macro photography, I didn’t have enough money to buy a macro lens.
So, what did I do at that time? Yes, you are thinking right; I started with my current lens by reversing it. I was astonished to see the result. After practicing and confirming that I could take macro photos, I invested in a macro lens.
I think if you are interested in taking macro photos, you can start by reversing the lens instead of buying a macro lens.
In macro photography, where capturing the tiniest details takes center stage, the reverse lens technique emerges as a creative and budget-friendly approach. Let’s explore what it is and how it empowers macro photography enthusiasts.
The Art of Reversing Lenses:
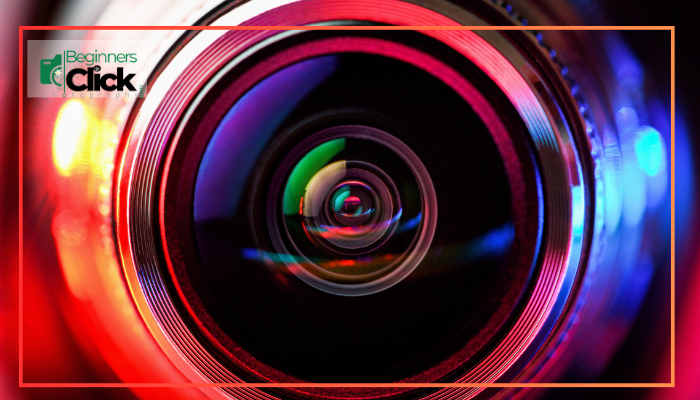
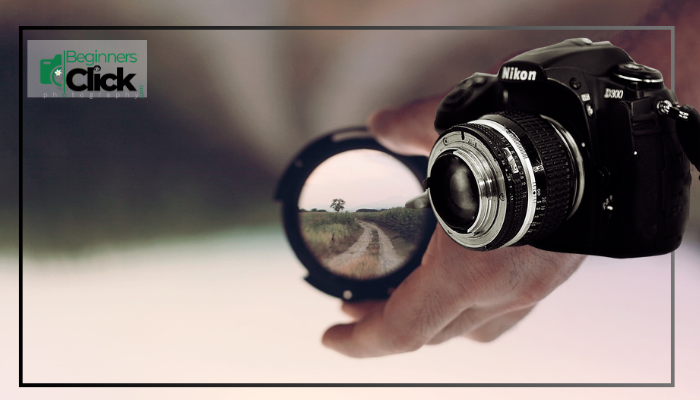
Imagine flipping your camera lens around so the rear element faces outwards and the front element sits snugly against your camera body. That’s the essence of the reverse lens technique. By employing a special adapter ring, you essentially transform your standard lens into a powerful macro tool.
The reverse lens technique uses an adapter to mount a lens backward onto your camera. This allows you to achieve high magnification for close-up shots, essentially turning your lens into a macro lens.
The reverse lens technique uses an adapter to mount a lens backward onto your camera. This allows you to achieve high magnification for close-up shots, essentially turning your lens into a macro lens.
Why Reverse Lenses?
There are two compelling reasons why macro photographers embrace the reverse lens technique:
Magnification Magic:
Standard lenses are designed to focus on distant objects. Reversing them unlocks a hidden superpower – significantly increased magnification. This allows you to capture close-up shots where your subject fills the frame, revealing details invisible to the naked eye.
Budget-Conscious Choice:
Dedicated macro lenses can be quite expensive. The reverse lens technique, on the other hand, utilizes lenses you might already own, making it a budget-friendly way to explore the world of macro photography.
Unique Effects:
The reversed perspective can create interesting and creative effects in your macro photos.
Exploring the Flip Side:
While the benefits are enticing, it’s important to acknowledge some limitations of the reverse lens technique:
Manual Everything:
Since the lens is reversed, autofocus becomes unavailable. You’ll need to rely on manual focus to achieve sharp results. This can be a rewarding challenge, but it requires practice and a keen eye.
Exposure Experimentation:
Reversing the lens can affect how light enters the camera. You might need to experiment with your camera settings (aperture, shutter speed, ISO) to achieve proper exposure in your close-up shots.
Limited Control:
Compared to dedicated macro lenses, you might have less control over certain aspects like image quality or working distance (the distance between your lens and the subject).
Is Reverse Lens Right for You?

If you’re a beginner in macro photography or on a budget, the reverse lens technique is a fantastic starting point. It allows you to experiment, develop your close-up photography skills, and discover the fascinating world of tiny details without a hefty investment. As your skills progress, you can always consider investing in a dedicated macro lens for even greater control and image quality.
How Many Techniques Are There?
There are two main ways to achieve reverse lens macro:
Using a Reverse Adapter: This is the most common method. You’ll need a specific adapter ring that allows you to mount your lens backward onto your camera body.
Hand-Holding: This involves physically holding the lens in front of your camera body, focusing manually, and taking the shot. It’s less precise but can be done in a pinch.
Suitable Lens Types:
The best lens types for reverse lens macro photography are:
Manual Lenses: These offer more control over aperture and focusing, which is crucial for macro work.
Prime Lenses: They generally have better image quality and sharpness compared to zoom lenses.
Wide-Angle Lenses: When reversed, they provide even higher magnification than telephoto lenses.
Things to Keep in Mind:
Focusing: Focusing can be challenging with reversed lenses, especially when hand-holding.
Aperture Control: Some lenses may lose their automatic aperture control when reversed.
Lighting: Macro photography often requires good lighting, so using a flash or external lighting setup might be necessary.
Overall, the reverse lens technique is a great way to explore macro photography without breaking the bank. It offers a unique perspective and allows you to capture stunning close-up details of small subjects.
So, grab your camera, dust off an old lens, and get ready to unlock the hidden world of magnification with the reverse lens technique!


That is the precise blog for anyone who wants to seek out out about this topic. You notice so much its almost onerous to argue with you (not that I truly would want…HaHa). You undoubtedly put a brand new spin on a subject thats been written about for years. Nice stuff, just great!
Thanks for your best complement for me and for my blog.
I just couldn’t depart your site before suggesting that I extremely enjoyed the standard information an individual supply to your visitors? Is gonna be back often in order to check up on new posts.
Thank you so much! I’m really glad you enjoyed the content. Your support means a lot, and I look forward to sharing more great posts with you. See you again soon!
I do agree with all the ideas you’ve presented in your post. They’re very convincing and will certainly work. Still, the posts are too short for starters. Could you please extend them a bit from next time? Thanks for the post.
Thank you so much for your thoughtful feedback! I truly appreciate your kind words and I’m glad you found the ideas convincing. You’re absolutely right—I’ll definitely try to make future posts more detailed and beginner-friendly. Stay tuned for more!
I’ve been browsing on-line more than 3 hours nowadays, but I never discovered any interesting article like yours. It¦s beautiful value sufficient for me. Personally, if all webmasters and bloggers made excellent content as you probably did, the internet will probably be much more useful than ever before.
Thank you so much for your kind words! I’m truly happy to hear that you found value in my article. Your feedback encourages me to keep sharing helpful content. I hope to keep meeting your expectations in the future!
you’re really a good webmaster. The site loading speed is incredible. It seems that you’re doing any unique trick. Furthermore, The contents are masterwork. you’ve done a excellent job on this topic!
Thank you so much for your kind words and appreciation. I truly value your feedback. I’m constantly trying to improve both the speed and quality of the content, so your encouragement means a lot. Thanks again for visiting!
Thanks for the sensible critique. Me & my neighbor were just preparing to do some research on this. We got a grab a book from our area library but I think I learned more clear from this post. I am very glad to see such fantastic information being shared freely out there.
Thank you so much for your kind words. I’m really happy to know that you found the post helpful and informative. It’s always great to hear that the content is making a real difference. Wishing you and your neighbor all the best in your research!
This guide is incredibly helpful for anyone starting out with photography and gimbals. The tips on shutter speed are explained in a way that’s easy to understand, even for beginners. I appreciate how the author breaks down complex concepts into manageable steps. The blog’s layout is also very user-friendly, making it a pleasure to read. Could you provide more examples of how to apply these techniques in real-world scenarios?
Thank you so much for your thoughtful feedback! I’m really glad to hear that you found the guide helpful and easy to follow — especially the section on shutter speed. I truly appreciate your suggestion about including real-world examples, and I’ll definitely work on adding those in upcoming posts. Stay tuned for more practical tips and feel free to share your thoughts anytime. Your input really helps improve the content!
Keep up the excellent work, I read few blog posts on this internet site and I believe that your website is real interesting and has lots of fantastic info .
Thank you so much for your kind and thoughtful comment! I’m really happy to hear that you found the content interesting and informative. Your support truly encourages me to keep sharing more valuable posts. Stay connected!
I just like the helpful information you supply to your articles. I will bookmark your weblog and test again right here frequently. I’m relatively sure I’ll be told lots of new stuff right right here! Best of luck for the next!
Thank you so much for your kind words and support! I’m really happy to know you found the content helpful and that you’ll be visiting regularly. Wishing you all the best as well — and I look forward to sharing more useful content with you soon!
Hey! Quick question that’s entirely off topic. Do you know how to make your site mobile friendly? My weblog looks weird when browsing from my apple iphone. I’m trying to find a theme or plugin that might be able to fix this problem. If you have any suggestions, please share. Appreciate it!
If your current theme isn’t working well on mobile, I recommend trying Astra (free) or Neve. Both are lightweight, mobile-optimized, and customizable.
I am now not sure where you are getting your info, but great topic. I must spend some time finding out much more or working out more. Thank you for great information I was searching for this info for my mission.
Thank you so much for your thoughtful comment! I really appreciate your curiosity and interest in learning more. I always try to gather reliable information and present it in a way that’s easy to understand. Wishing you the best with your mission—feel free to visit anytime if you need more insights!
Thank you a bunch for sharing this with all of us you really recognize what you’re speaking about! Bookmarked. Please also seek advice from my website =). We can have a link trade contract between us!
Thanks for stopping by and sharing your thoughts! I appreciate your interest. I prefer to keep the blog focused on original content and tips for my readers.
Aw, this was a very nice post. In concept I would like to put in writing like this moreover – taking time and actual effort to make a very good article… however what can I say… I procrastinate alot and not at all appear to get something done.
Thank you so much for your kind words! Writing definitely takes time and effort, but the most important step is simply starting—even small progress adds up over time. Don’t be too hard on yourself, you’ll get there!
You can definitely see your skills in the work you write. The world hopes for more passionate writers like you who aren’t afraid to say how they believe. Always go after your heart.
Thank you so much for such encouraging words! 😊 It means a lot to hear that my writing resonates with readers. I’ll definitely keep following my heart and sharing what I believe in. Your support truly inspires me!
I was curious if you ever considered changing the page layout of your site? Its very well written; I love what youve got to say. But maybe you could a little more in the way of content so people could connect with it better. Youve got an awful lot of text for only having one or two pictures. Maybe you could space it out better?
Thank you so much for your thoughtful feedback! 😊 I’m really glad to know you enjoy the content. You’re absolutely right—adding more visuals and improving the layout can make the posts more engaging. I’ll definitely keep your suggestion in mind and try to make the site more visually friendly in the future.
As soon as I detected this website I went on reddit to share some of the love with them.
Wow! 😊 Thank you so much for such amazing support. It really means a lot to know that you shared it on Reddit. That’s truly inspiring for me.
Fantastic website. Plenty of helpful information here. I am sending it to a few buddies ans also sharing in delicious. And of course, thank you to your effort!
Thank you so much for your kind words and support! 😊 It feels amazing to know that you not only read the content but also shared it with your friends. That truly inspires me, and I’ll keep trying to provide even more helpful content in the future.
I relish, result in I found exactly what I was looking for. You’ve ended my 4 day lengthy hunt! God Bless you man. Have a great day. Bye
I’m so glad to hear that you finally found what you were looking for! Comments like yours truly inspire me to keep creating more helpful content. Thank you for taking the time to share your kind words. Wishing you all the best!