Table of Contents
ToggleLearn with Mistakes, Fix with Practice — A Beginner’s Real-World Guide to Photography

Want to learn photography for beginners step by step-by-step guide?
You’re in the right place. Whether you’re using a phone, a basic DSLR, or just curious about how to take better pictures, this guide will walk you through the essentials. No confusing jargon, no overwhelming settings — just clear, simple steps to help you understand your camera, light, and composition like a pro.
Have you ever looked at a photograph and felt something shift inside you?
Maybe it was the light, the timing, or the story it told—without saying a single word. Over the past 12 years as a photographer, I’ve felt that magic again and again. I’ve captured moments that made people smile, tear up, or just pause in awe. I’ve also spent years teaching photography to beginners, watching their confusion slowly turn into confidence.
Why I made this course
But I wasn’t always here.
I still remember the day I bought my first DSLR.
I was excited, curious… and totally lost.
I didn’t know what ISO was, what aperture meant, or why my photos looked so different from what I imagined. I searched for help—some beginner-friendly course, some easy guide that could walk with me, not ahead of me. But everywhere I looked, I found the same thing: technical jargon, complex terms, and explanations that made me feel even more confused.
That’s when I made a promise to myself:
“One day, I’ll make the easiest photography guide for people like me—for those who want to begin, not get overwhelmed.”
And here it is. This isn’t just a blog post—it’s a small journey. A walk together. One beginner helping another. No shortcuts, no complicated language, no showing off. Just lessons built from real experience, real struggle, and real learning.
Learning photography for beginners step by step helps build a strong foundation without feeling overwhelmed.
Who is a photographer?
Now, the question is yours to answer.
Do you want to just hold a camera, or do you truly want to become a photographer?
Anyone can click a photo. But not everyone becomes a photographer.
The word “photographer” carries weight. It’s not just about owning a DSLR or knowing some technical terms. A true photographer sees the world differently. They tell stories through light and shadow. They capture not just what’s in front of the lens, but what’s within it.
To be called a photographer, you must earn it—not with gear, but with vision, with practice, with intent. Recognition comes when your work speaks for you.
Right now, you’re a beginner—and that’s exactly where every photographer starts. If you’re ready to grow step by step, learn with patience, and fall in love with the process, then yes—this course is for you.
This isn’t just about taking photos.
It’s about learning to see.
Let’s do this. Slowly. Together.
Not to become a “photographer” overnight—but to begin the journey of truly becoming one.
Step 1: Drawing
Oh no, don’t worry. I’m not asking you to be an artist.
All I want is this: grab a plain sheet of paper—just any paper you can find. Now, take a pen or pencil and draw something. Anything.
It doesn’t have to be beautiful. It doesn’t have to be perfect.
Just pick a subject you like—it could be a bottle, a coffee mug, a doll, a chair… whatever you feel like.
This is not about how well you draw. It’s about seeing.
When you try to draw something, you automatically look at it differently. You start noticing its shape, its light, its shadows—and that, my friend, is the first step to becoming a photographer.
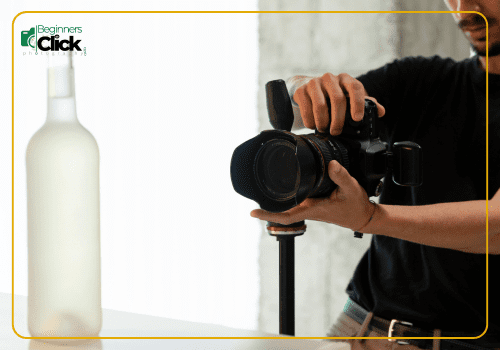
So pause here.
Stop reading.
Do the drawing. Really.
Come back once you’ve drawn something. No skipping!
Step 2: Click with Your Smartphone or DSLR
Don’t worry if you don’t have a DSLR.
Use your smartphone—it’s just as powerful when you have the right mindset.
Now, remember the subject you drew in Step 1?
Yes, that bottle, doll, or whatever you chose—now it’s time to click some photos of it.
Use your DSLR if you have one. But if not, your phone camera is perfect for this step.
The important thing is how you see, not what you use.
Pause here again.
Yes, really.
Stop reading and complete Step 2. Take at least 5 snapshots from different angles.
Come back when you’re done.
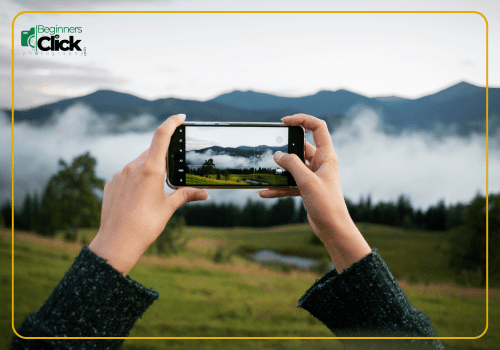
Evaluation between steps 1 and 2
Now, let’s evaluate.
In Step 1, when you drew that subject, you took your time. You observed every little detail—the curve, the shadow, the edges. You were careful, focused, and patient.
But in Step 2, when you clicked the photo, you probably just tapped and moved on.
No hesitation. No deep observation.
Why?
Because drawing feels expensive. You get one page. You don’t want to waste it.
But clicking photos? That’s endless. Snap, delete, snap again. No cost. No pressure. No care.
And this is the most important lesson in basic photography.
Lesson One: Time Is Everything
To take a meaningful photograph, you have to slow down.
Before clicking, spend time just looking at your subject, its background, the light, the shadows, and the story.
Your camera—DSLR or smartphone—is just a tool. But your eyes, your attention, your care… that’s what makes you a photographer.
Step 3: The Rule of Thirds
Let’s talk about something really simple… and yet, truly powerful.
The Rule of Thirds—a basic rule that turns ordinary photos into eye-catching ones.
Let’s Imagine…
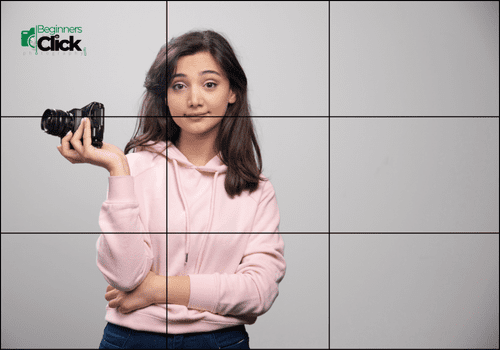
Take a plain A4 size paper in your hand. Now, imagine dividing it into nine equal boxes using two horizontal lines and two vertical lines.
That’s your frame.
That’s your guide.
That’s how we apply the Rule of Thirds.
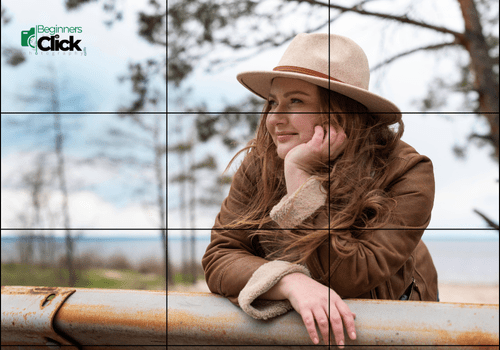
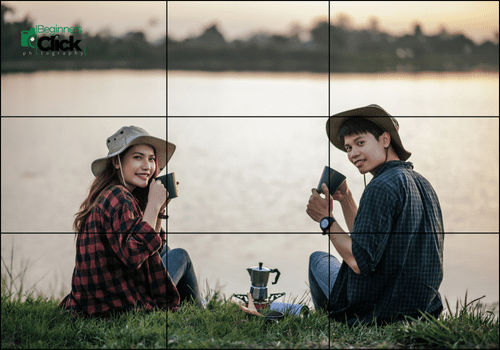
If I understand correctly about the rule of thirds, first, you have to see some pictures/images below-
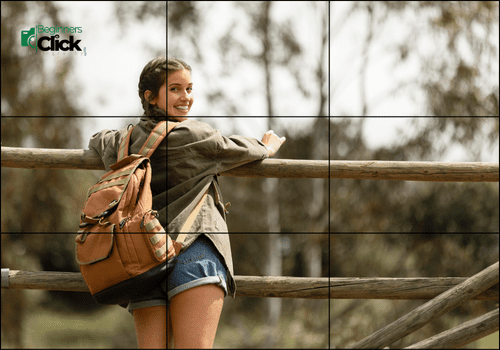
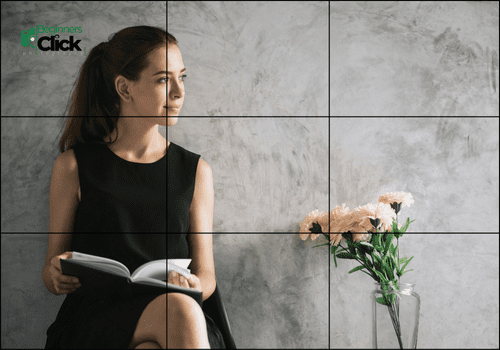
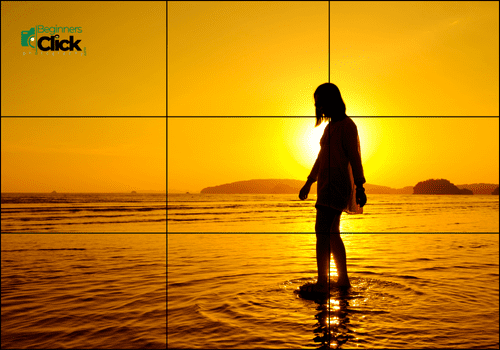
Most beginner photographers place their subject right in the center of the frame. And to be honest, I did the same. Every. Single. Time.
But one day, someone told me: “Try shifting your subject to the side.”
At first, it felt… strange. Why not center it?
But when I tried, I saw the magic.
The photo breathed.
It had space, depth, and emotion.
So, what’s the Rule of Thirds?
It’s a composition rule where you place the important part of your photo along those lines or where the lines cross—at the four intersections.
For example:
- If you’re photographing a person, place their eye on one of the intersections.
- If it’s a landscape, keep the horizon along the upper or lower third line.
- If it’s a product or object, avoid putting it dead center—shift it slightly left or right, top or bottom.
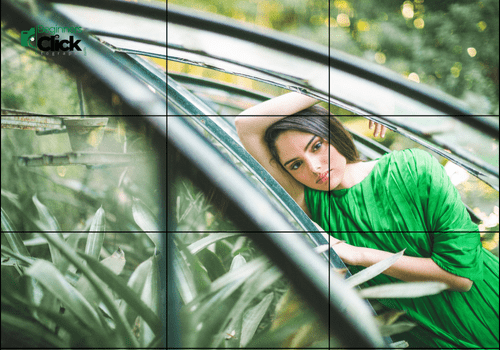
This makes your photos more natural, dynamic, and pleasing to the eye. It’s like telling your viewer, “Hey, there’s more to look at.”
My Beginner Story
When I first heard about this rule, I thought it was too technical. But it’s not. It’s just a different way to look.
I remember trying it with a cup of tea on my table.
I took one photo in the center, and then another using the Rule of Thirds.
Guess what? The second photo just felt better, even though nothing changed except where I placed the cup.
And that’s what this is all about.
Feeling. Balance. Subtle beauty.
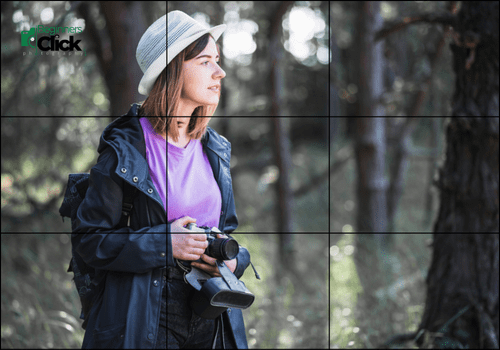
Composition rules like rule of thirds or leading lines become clearer through photography for beginners step by step tutorials.
Your Task:
- Choose a simple object—something you have around: a book, a mug, a flower.
- Take two photos of it:
- One with the object in the center.
- One follows the Rule of Thirds.
- One with the object in the center.
- Compare them. Feel the difference.
- Bonus: Try placing your subject at all four intersections—see which feels best.
Tip:
Your smartphone likely has a grid feature. Turn it on from your camera settings. It’ll show the lines directly on your screen, making the “Rule of Thirds” even easier to apply.
Step 4: Choosing Your Photography Type
Let’s pause for a moment and ask ourselves an important question:
What kind of photographer do you want to be?
Do you want to capture the quiet beauty of nature?
Tell stories of people through portraits?
Freeze the action in a sports match?
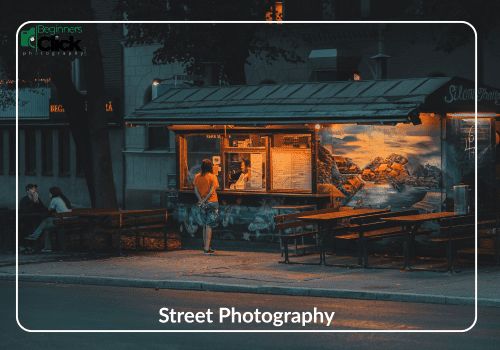
Or explore city life through the lens of street photography.
This is an essential step in your journey.
Knowing your interest will shape how you practice, what you focus on, and where you’ll grow.
Why It Matters
Many people rush into photography, clicking everything they see. That’s not wrong, but it can be confusing. If you want to earn from photography one day, you’ll need to find your focus. You don’t have to pick a final destination now, but having a direction helps.
Common Photography Types:
- Portrait Photography
- Landscape Photography
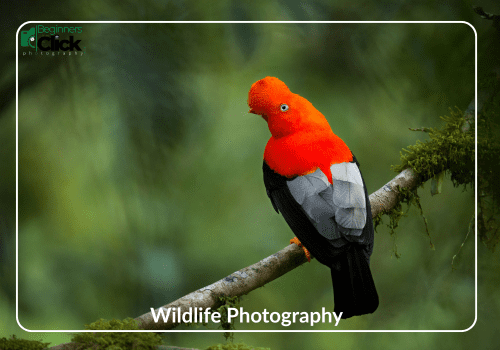
- Wildlife Photography
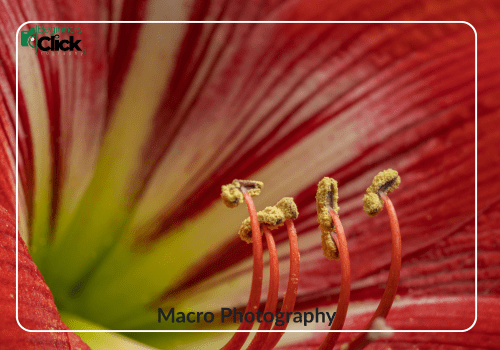
- Macro Photography
- Food Photography
- Sports Photography
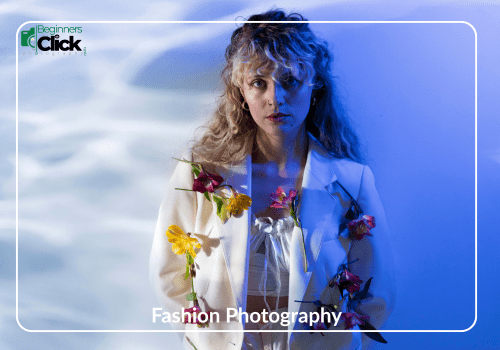
- Fashion Photography
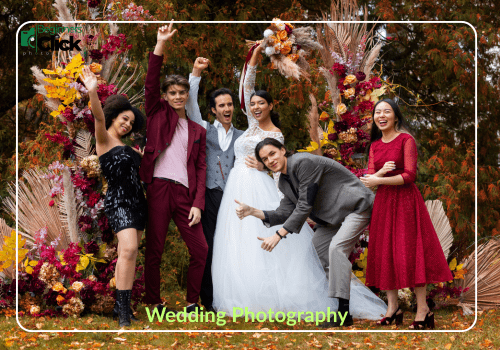
- Wedding Photography
- Event Photography
- Travel Photography
- Street Photography
- Corporate Photography
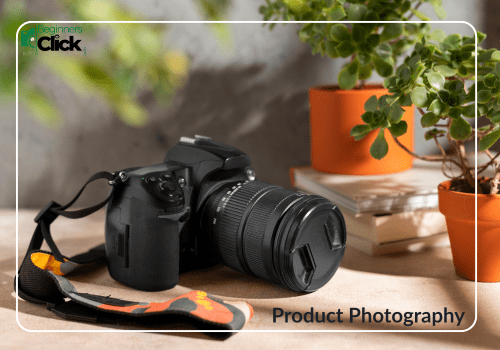
- Product Photography
- Portfolio Photography
- Freelance Photography
- Photojournalism
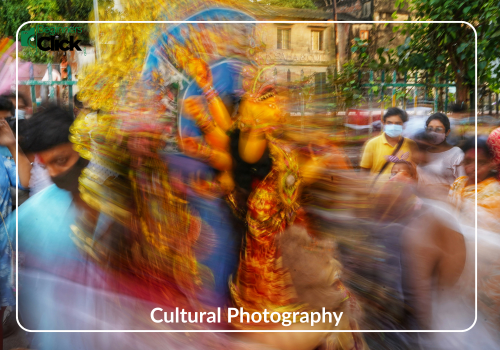
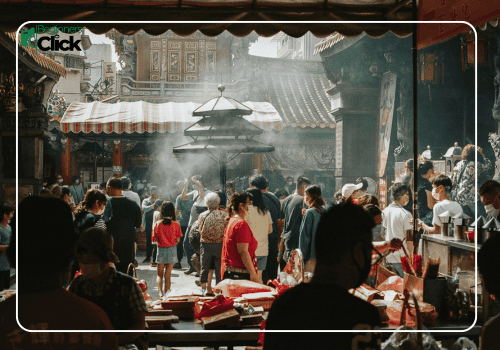
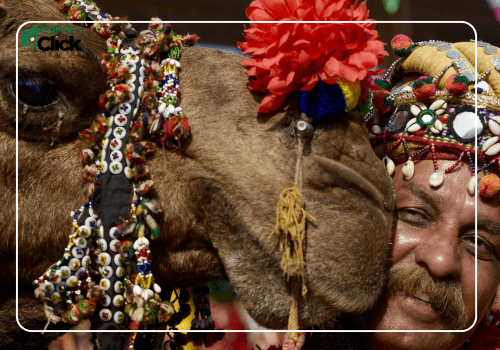
- Cultural Photography

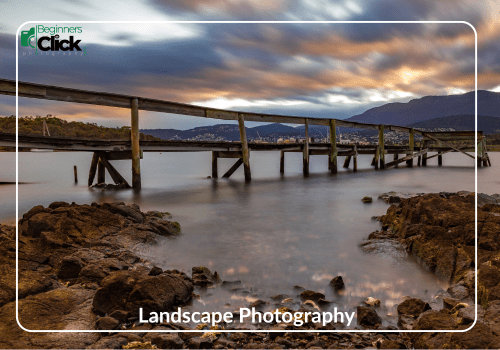
Let’s Talk About Landscape Photography
You might be thinking,
“Okay, but where do I actually begin?”
I’ve seen this question in the eyes of many beginners. They buy a camera, get super excited… then freeze.
“What should I shoot first? What type of photography is right for me?”
Let me make it simple for you:
Start with Landscape Photography.
It doesn’t matter where you live.
You don’t need a studio, a model, or even any fancy gear.
You already have everything around you—the world itself.
So, What Is a Landscape?
Take a look outside your window.
See that road? The sky above it? A tree swaying in the breeze? Maybe a field, a hill, or even the rooftop across the street?
That’s all, landscape.
Landscape photography is not just about mountains and sunsets. It’s about capturing the environment around you—whatever that may be.
Here’s what can be part of a landscape photo:
- Natural features: mountains, hills, rivers, trees, flowers
- Man-made elements: buildings, roads, fences
- Temporary things: cloudy skies, sunlight, shadows, snow, or even rain puddles
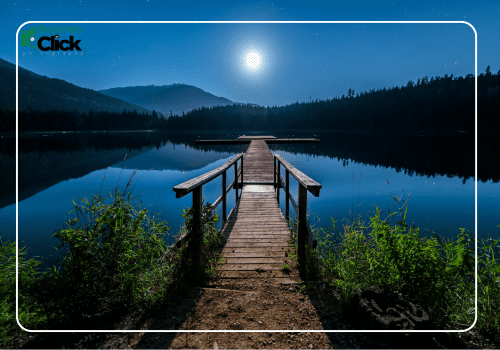
In short, whatever you see in front of you that forms the “scene” is your landscape.
My First Landscape Attempt
My first landscape photo wasn’t of the sea or a mountain. It was my rooftop during sunset. Nothing special, right? But the way the light painted the water tank, the way the clouds added depth—I clicked it, and I felt proud. That’s when I realized: beauty is everywhere when you slow down and look.
Beginner’s Mini-Task:
Task 1:
Stand in one place. Look around slowly.
Now, without moving too far, find one “scene” that feels peaceful or interesting.
Task 2:
Take a photo of it. Don’t think too much. Use auto mode. Click.
Task 3:
Write down what you liked about that scene. Was it the light? The sky? The silence?
Task 4:
Now try taking the same photo at a different time of day—morning, evening, even during rain or fog.
Summary for You:
- This blog is written only for beginners, so I’m keeping it simple.
- We’re starting with landscape photography because it’s all around you.
- If you’re curious about other photography types (portrait, macro, street…), I’ll cover that too—but first, let’s master what we already see.
This article is specifically for beginner photographers, which is why I’ve focused on advice that’s best suited for beginners. If you’re looking for more detailed information on different types of photography, please check out our Pro Lessons here.
Start Taking Photo
Now, it’s time to jump into Step 4. Let’s put all the theory aside and get hands-on with your camera. Here’s how you’ll start:
Capture 100 Photos Without Worrying About Rules
Take 100 different landscape photos, focusing on simply capturing what you see. Don’t worry about settings or rules just yet. If you’re using a DSLR, switch it to auto mode, or if you’re using a smartphone, do the same. The goal here is to shoot freely and observe how your camera responds to different scenes.
Analyze Your Photos
Once you’ve taken your photos, transfer them to your computer. Spend some time carefully reviewing each image. Make sure to look at each photo at least five times, paying attention to the composition, light, and subject. This will help you begin to see what works and what doesn’t, even without thinking too much about technical details.
Study Award-Winning Photos
Now, go to Google and search for award-winning landscape photos. Take some time to study these images and observe what makes them stand out. This will help you learn more about the visual elements that make a great landscape shot.
Focus on the Rule of Thirds
Put Theory into Practice
Next, head outside again and practice applying the rule of thirds to your photography. For this session, focus solely on this one technique and ignore other concepts for now. Aim to take 100 photos using the rule of thirds. This exercise will help you develop a better understanding of composition.
Practice for 5-10 Days
For the next 5-10 days, keep shooting using the rule of thirds and auto mode on your camera. Don’t worry about any other settings or techniques for now — just focus on mastering this basic composition rule. Once you feel confident, come back to my blog for the next step!
Important Notes
Make sure you’ve completed Steps 1, 2, 3, and 4 before moving on. You must practice for 10 days and take photos consistently to move forward.
Many mistakes can be avoided if you follow photography for beginners step by step and build good habits early.
Step 5: Exposure Triangle
Welcome back, photographer!
I hope you had a joyful 10 days exploring landscapes, clicking with curiosity, and experimenting with your camera.
Now it’s time to go a little deeper—not harder, just smarter.
Today’s topic may sound technical, but I promise that once you grasp the idea, you’ll never look at photography the same way again.
What is the Exposure Triangle?
Imagine three best friends working together to decide how your photo will turn out.
These friends are:
- ISO (light sensitivity)
- Shutter Speed (how long the light enters)
- Aperture (how much light enters)
Together, they form the Exposure Triangle—a balance that ensures your image is neither too dark nor too bright.
When you understand how to balance these three,
You can shoot in bright sunlight
Or in soft candlelight
Or even under the stars at night!
Let’s Break it Down
1. ISO Settings: Photography for Beginners Simplified
Think of ISO as the volume knob of your camera.
- Low ISO (100-200) → Perfect for daylight. Less noise, sharper image.
- High ISO (800, 1600, 3200) → Helps in low-light, but brings grain/noise.
Beginner Task:
Go outside during the day. Set ISO to 100. Take a photo.
Now step inside a dimly lit room. Increase ISO to 800. Take another.
Compare both. Observe the grain in the second photo.
Good lighting is the soul of every photo, and learning photography for beginners step by step teaches you how to use light creatively.
2. Shutter Speed – The Timing Gate
Shutter speed is like a window.
The longer it stays open, the more light comes in.
- Slow shutter speed (e.g. 1/10s) → More light, but motion blur
→ Great for waterfalls, light trails - Fast shutter speed (e.g. 1/1000s) → Less light, but action freeze
→ Great for sports, wildlife
Beginner Task:
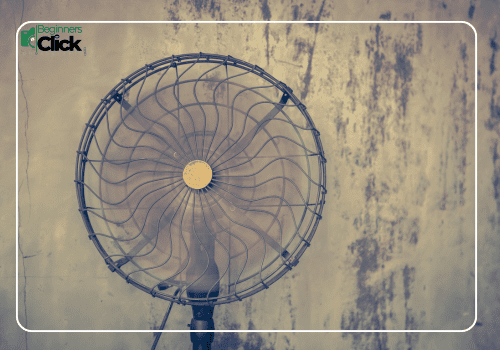
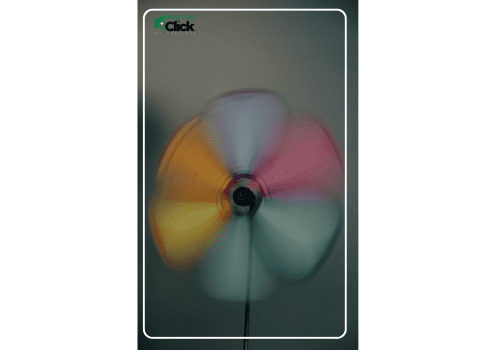
Take a picture of a moving fan with a slow shutter speed (1/10s).
Now try again with fast speed (1/1000s).
See the difference between blur and freeze.
3. Understanding Aperture for Photography Beginners
Aperture controls how wide your lens opens.
- Wide aperture (f/1.8, f/2.8) → More light, blurred background
- Narrow aperture (f/8, f/11) → Less light, more things in focus
Beginner Task:
Click a close-up of a flower using f/1.8 (if possible).
Now take the same photo with f/8.
Notice how the background goes from blurry to clear.

How They Work Together:
ISO, shutter speed, and aperture are like ingredients of a recipe.
Change one, and you must adjust the others to keep the balance.
Example:
If you slow down the shutter speed and lower the ISO.
If you open the aperture wider, you may need a faster shutter speed.
Mastering aperture, shutter speed, and ISO becomes easier when you follow photography for beginners step by step.
Challenge:
Try taking the same scene 3 times:
- Low ISO + Wide aperture + Slow shutter
- Medium ISO + Medium aperture + Medium shutter
- High ISO + Narrow aperture + Fast shutter
Compare. Learn. Repeat.
Final Note:
This step is the heart of manual photography. Don’t rush it. Just understand the concept now. Practice will do the rest. Try taking a similar photo at home or in your surroundings.
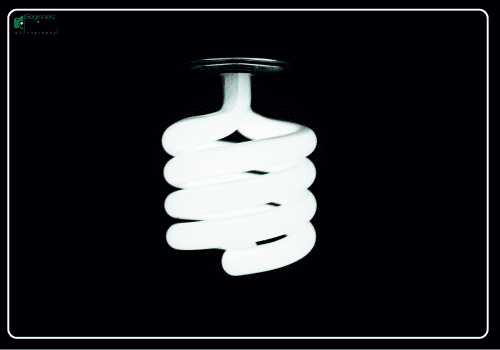

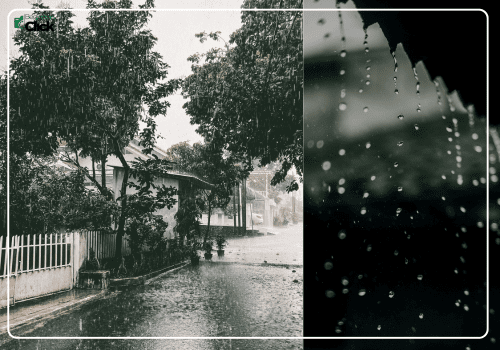
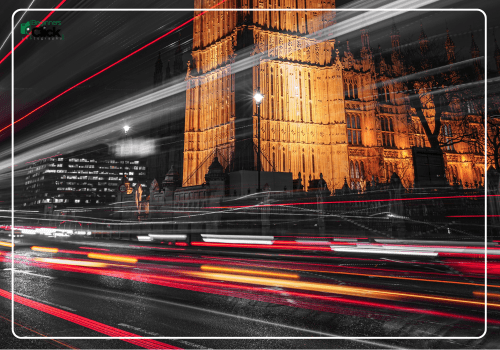
One of the best ways to grow is to follow photography for beginners step by step and apply each concept with real-life practice.
Your Journey Has Just Begun
So here you are—at the end of this beginner’s guide, but really… It’s just the beginning of something beautiful.
You’ve learned how to see before you shoot.
You’ve played with drawing, clicking, observing, and understanding the core of photography—light, focus, and patience.
Here’s what this journey has given you so far:
- You’ve learned the value of observation
- You’ve explored composition techniques like the Rule of Thirds
- You’ve unlocked the Exposure Triangle—ISO, Shutter, Aperture
- You’ve clicked hundreds of photos and trusted your vision
- Most importantly, you’ve planted the seed to grow as a thoughtful photographer
Photography is not about perfection. It’s about practice. It’s about showing the world not just how it looks, but how you see it.
So don’t stop here.
Keep your camera close.
Keep your eyes wide open.
And keep learning.
The next steps are waiting for you. And I’ll be right here, waiting to walk with you again.
After all these lessons, it’s clear that photography for beginners step by step isn’t just a concept — it’s a practical path to confident shooting.
Top 5 Budget-Friendly DSLR Cameras for Beginners / Essential Gear for Photography Beginners (2025 Edition)
- Sensor: 24.1MP APS-C CMOS
- Video: Full HD 1080p
- Connectivity: Built-in Wi-Fi and NFC
- Estimated Price: $450 / ₹38,000 / ৳48,000
Why it’s great for beginners:
The Canon 1500D is ideal for first-time DSLR users. Its intuitive menu system, helpful auto modes, and solid image quality make it easy to learn photography. With Wi-Fi and NFC, you can quickly share your photos. It’s lightweight and affordable, making it a perfect entry point into DSLR photography without overwhelming you with technicalities.
- Sensor: 24.2MP APS-C CMOS
- Video: Full HD 1080p
- Battery Life: Excellent (up to 1500 shots)
- Estimated Price: $500 / ₹42,000 / ৳55,000
Why it’s great for beginners:
The Nikon D3500 is known for its beginner-friendly “Guide Mode,” which walks you through shooting settings step-by-step. It offers sharp image quality, exceptional battery life, and a comfortable grip for long usage. It’s simple yet powerful, letting you grow from auto mode to manual controls gradually—ideal for learning at your own pace.
- Sensor: 24.1MP Dual Pixel CMOS
- Video: 4K recording
- Display: Vari-angle Touchscreen LCD
- Estimated Price: $700 / ₹58,000 / ৳70,000
Why it’s great for beginners:
This camera blends portability with power. Its compact size, flip-out touchscreen, and 4K video capability make it great for photography and vlogging. The Dual Pixel autofocus ensures fast and smooth focusing, especially in live view. For beginners who want to grow creatively and maybe shoot video too, this is a fantastic pick.
- Sensor: 24.2MP APS-C CMOS
- Video: Full HD 1080p
- Features: Touchscreen, Wi-Fi, Bluetooth
- Estimated Price: $725 / ₹60,000 / ৳75,000
Why it’s great for beginners:
The D5600 offers a smooth entry into DSLR photography with advanced creative controls. The flip-out touchscreen is excellent for composing shots at different angles, and built-in wireless features let you easily transfer photos. It’s slightly more advanced than the D3500 but still very accessible, perfect for learners ready to level up.
- Sensor: 18MP APS-C CMOS
- Video: Full HD 1080p
- Build: Lightweight & user-friendly
- Estimated Price: $400 / ₹34,000 / ৳42,000
Why it’s great for beginners:
This is Canon’s most affordable DSLR. It’s basic but reliable, and great for those just stepping into the world of DSLR photography. It teaches you the fundamentals without the intimidation of advanced features. If you’re on a strict budget but still want DSLR-quality images, this is a great start.
When choosing your first camera, understanding photography for beginners step by step can guide you to make the right decision based on your goals.
If you’re ready to go deeper into photography for beginners step by step, feel free to reach out or join our free email series.
Frequently Asked Questions (FAQ) for Beginner Photographers
Yes, absolutely! You don’t need a DSLR or expensive gear to start your photography journey. The camera on your smartphone is more powerful than most people realize. In fact, many award-winning photos today are taken on mobile phones. What matters more is your eye for detail, light, and composition.
When you're starting out, your phone gives you enough flexibility to learn the basics—like framing, exposure, and timing—without being overwhelmed by buttons and settings. You can try every exercise from this blog using your smartphone. Practice with natural light, use the grid to apply the rule of thirds, and shoot in various angles and times of day.
The best part? You’ll always have your phone with you. That means more chances to practice, and that’s what really helps you grow. Once you feel confident and want more control, you can always move on to a DSLR or mirrorless camera later.
Not at all. A DSLR is a great tool, but it’s not the only path to becoming a photographer. Photography is not about gear; it’s about seeing the world differently and telling stories through images. Even with a basic smartphone or point-and-shoot camera, you can capture powerful photos if you understand light, subject, and timing.
Many world-famous photographers started with very basic equipment. What made them stand out was their ability to observe and their patience to learn. As a beginner, jumping into a DSLR with too many features can actually overwhelm you. It’s better to master your composition and timing first.
Eventually, when you feel limited by your current camera—for example, in night photography, depth of field, or lens flexibility—you can upgrade. But even then, remember: a DSLR is just a tool. The magic always lies in the photographer, not the camera.
The best type of photography for beginners is definitely landscape photography. Why? Because it’s available everywhere. You don’t need a model, a studio, or permission to begin. Just step outside, look around, and you'll find landscapes—roads, fields, cityscapes, trees, sunsets, clouds—all around you.
Landscape photography trains your eyes to see shapes, patterns, and light. It teaches you to wait for the perfect moment (like the golden hour) and helps you practice framing using techniques like the Rule of Thirds. Since you’re not dealing with fast-moving subjects or complex lighting, you can focus purely on observation and timing.
Another reason landscape is a great starting point is that it's low-pressure. The environment doesn’t judge you. You can make mistakes, experiment, and learn without stress. Over time, this builds your confidence to move on to portraits, events, or any style you wish to explore.
If I had to choose just one skill, it would be observation. Good photographers don’t just click—they see. They notice how light falls on a face, how shadows change with time, how a small detail in the background can make or break a photo.
Being observant helps you frame better compositions. It teaches you patience—to wait for the right light or moment. It trains your mind to think before you click, and that’s where true improvement happens.
Most beginners focus too much on settings and gear. But even the best camera will produce boring photos if you don’t train your eyes. Start by slowing down. Spend time just looking at your surroundings. What’s interesting? What emotion does the scene give you? Is the light harsh or soft?
When your observation becomes intentional, your photography becomes meaningful.
The more, the better! When you're just starting out, you should take hundreds—even thousands—of photos. Why? Because photography is a skill that improves with practice, not just theory. Each click teaches you something new—about angles, lighting, focus, and most importantly, your own style.
Think of it like learning a musical instrument. You can’t master guitar by just reading music theory—you have to practice. It’s the same with photography. The more you shoot, the more you notice small things: “This looks better from a lower angle,” or “This light works better in the morning.”
Don't worry if 80% of your photos look bad at first. That’s part of the process. Review your photos regularly, note what you like or don’t, and keep experimenting. Over time, those random clicks will turn into deliberate, powerful shots.
Not necessarily. If you jump straight into manual mode as a beginner, it can feel overwhelming. It’s like trying to drive a manual car before understanding the basics of steering. Auto mode is there for a reason—it helps you get comfortable with your camera and focus on what matters most: composition and light.
Start by practicing on auto mode or semi-auto modes like Aperture Priority or Shutter Priority. Once you’ve mastered observing your subject and framing your shot, you’ll naturally get curious about what ISO or shutter speed does. That’s the perfect time to slowly move into manual mode.
Manual mode is powerful, but it’s only useful when you’re confident enough to make decisions about settings. Until then, it’s perfectly fine to rely on automation. Don’t let “manual mode pressure” ruin your joy of learning.
A good photo doesn’t always mean it’s perfectly sharp or technically flawless. A good photo makes someone feel something. It tells a story. It holds attention. As a beginner, you’ll naturally question your photos—but don’t measure quality only by likes or comments.
Ask yourself:
- Does it show what I wanted to capture?
- Is there emotion in it?
- Would I stop to look at it if someone else took it?
Over time, as your eye becomes sharper, you’ll spot the small details—like clutter in the background or better light angles. But even before that, if your photo captures a moment that means something to you—that's a good photo.
Trust your instinct. Show your work. Accept feedback. But most importantly, keep enjoying the process of telling stories through your lens.
Absolutely. In fact, photo editing is part of the creative process, not cheating. Even professional photographers edit their photos to correct lighting, adjust contrast, or enhance color tone. As a beginner, you don’t need to dive into Photoshop—simple apps like Snapseed, Lightroom Mobile, or VSCO are more than enough.
Editing helps you understand what makes a good image even better. For example, if you edit brightness and suddenly your subject pops—that’s a learning moment. You begin to think about lighting before clicking.
That said, don’t over-edit. Avoid filters that distort reality or kill natural beauty. Think of editing like seasoning food—just enough to bring out the best flavor, not to hide the original taste.
So yes, start editing. It’ll teach you to see with more clarity.
Great question—and important too! Every beginner makes mistakes. What matters is recognizing them and learning. Here are a few common ones:
- Always placing the subject in the center — Try using the Rule of Thirds. It makes photos more dynamic.
- Relying too much on flash — Natural light is often softer and more flattering.
- Zooming digitally — This reduces image quality. Instead, move closer physically.
- Ignoring the background — A messy or distracting background can ruin a good subject.
- Shooting only in portrait or only in landscape — Try both to see what fits better.
And the biggest one: waiting for perfect gear before starting. Start now, with what you have. Your skill will always matter more than your equipment.
There’s no fixed timeline. Some people pick it up in months, others take years. And that’s perfectly okay. Photography is not a race—it’s a journey. The more you practice, the better you’ll get. But improvement doesn’t always show up immediately. Sometimes it’s slow, invisible, and then suddenly—something clicks.
Instead of chasing perfection, focus on progress. Take photos regularly. Review your work. Learn from others, ask questions, and challenge yourself with new subjects and styles.
Also, don’t compare your beginning to someone else’s middle. Just keep showing up with your camera and your curiosity. Over time, you’ll not just get “good”—you’ll develop a style that’s completely your own.


Appreciating the time and effort you put into your website and detailed information you present. It’s nice to come across a blog every once in a while that isn’t the same outdated rehashed information. Fantastic read! I’ve saved your site and I’m adding your RSS feeds to my Google account.
Thanks for your nice comments.
There is obviously a bunch to know about this. I think you made certain nice points in features also.
Thank you! I’m glad you found the points interesting. There’s definitely a lot to explore in this topic, and I’ll continue sharing more insights. Let me know if there’s anything specific you’d like me to cover!
Some really prize posts on this site, saved to favorites.
Thank you so much! I’m really happy to know you found the posts valuable enough to save. Your support means a lot—stay connected for more!
This website online is known as a walk-by means of for the entire information you needed about this and didn’t know who to ask. Glimpse here, and also you’ll positively discover it.
Thank you so much for your kind words! I’m really glad to know that the content was helpful to you. Your feedback encourages me to continue creating more informative articles. Stay tuned for more!
Remarkable! Its actually remarkable piece of writing,
I have got much clear idea concerning from this article.
Thank you so much! 😊
I’m really glad to hear that the article helped you understand the topic more clearly. Your feedback means a lot and encourages me to keep sharing more helpful content. Stay connected!
Glad to be one of the visitants on this amazing web site : D.
Happy to have you here! Thanks for visiting and being part of this journey 😊.
A lot of what you articulate is astonishingly precise and it makes me ponder why I had not looked at this in this light previously. Your article really did switch the light on for me as far as this subject matter goes. Nevertheless there is actually 1 position I am not necessarily too comfortable with so whilst I make an effort to reconcile that with the actual main theme of your point, let me observe what all the rest of your readers have to say.Very well done.
Thank you so much for your detailed and thoughtful comment! 😊 I’m really glad to know the article gave you a new perspective. Your feedback is valuable too—if everyone had the same viewpoint, there’d be less to learn. Hopefully, with input from other readers as well, the topic will become even clearer. Truly grateful for your support!
I?¦ve been exploring for a little for any high-quality articles or weblog posts in this sort of space . Exploring in Yahoo I at last stumbled upon this website. Studying this information So i?¦m glad to convey that I’ve an incredibly excellent uncanny feeling I discovered exactly what I needed. I most for sure will make sure to do not disregard this website and provides it a glance regularly.
Thank you for your kind words! I’m really glad you found exactly what you were looking for. Stay connected and keep visiting — more useful content is on the way!
You completed certain good points there. I did a search on the matter and found the majority of persons will agree with your blog.
Thank you! I’m glad to hear that the points resonated with you. It’s always great to know that others find the information useful too.
An fascinating discussion is worth comment. I believe that you should write more on this subject, it won’t be a taboo subject but generally persons are not enough to speak on such topics. To the next. Cheers
Thank you so much for your thoughtful comment! 🙏 I completely agree — some topics deserve more open discussion, and I’ll definitely explore this subject further in future posts. Your feedback truly motivates me to keep writing meaningful content. Cheers!
📩 Contact: info@beginnersclick.com
📰 Subscribe: Join our newsletter