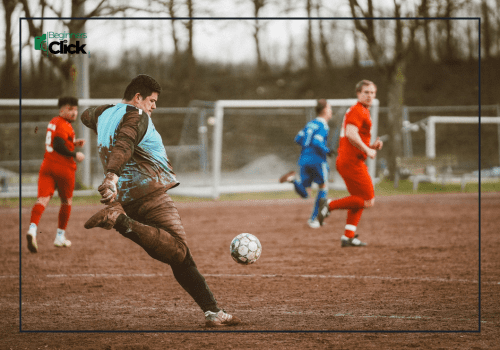
I still remember my first attempt at capturing a moving subject. It was a local football match on a dusty field, and I thought my camera would do the magic. In reality, all I got was a series of blurry players running into each other. At that time, I didn’t even know shutter speed was the real hero behind freezing action. I kept blaming my gear, thinking I needed an expensive camera. But the truth was, the problem wasn’t the camera—it was me.
That day, I went home frustrated, but also curious. Why did my photos fail? What did professional photographers know that I didn’t? That curiosity led me to experiment, fail again, and eventually figure out the techniques of moving subject photography. From missing the flight of a bird to ruining low-light action shots, my mistakes became my biggest teachers. Looking back now, I laugh at how clueless I was, but I also feel grateful—because without those errors, I wouldn’t have learned how to capture action with confidence.

This article isn’t just about camera settings or technical jargon—it’s about real experiences, funny mistakes, and lessons that shaped my journey. If you’ve ever struggled with moving subjects, trust me, you’re not alone. Let’s dive in.
Table of Contents
ToggleWhy Moving Subject Photography Feels So Hard
Photographing a still subject is like having a calm conversation—you can take your time, adjust the frame, and make sure everything looks perfect before pressing the shutter. But the moment your subject starts moving, the entire dynamic changes. Suddenly, it feels less like photography and more like a game of reaction speed. You don’t just click; you chase, predict, and sometimes pray that your timing matches the action.
I still remember the first time I tried to capture a street cyclist. I spotted him from a distance, lined up my shot, and thought I was ready. But by the time I pressed the shutter, all I got was the back wheel disappearing out of the frame. That single miss made me realize something important—timing is everything in moving subject photography.
Unlike still photography, you don’t have the luxury of endless retries. Action is unpredictable. A footballer may suddenly change direction, a bird may dive instead of flying straight, or a car may accelerate when you least expect it. These surprises test not only your technical skills but also your anticipation as a photographer.

That’s what makes moving subject photography both frustrating and rewarding. The challenge lies in syncing your vision, reflexes, and camera settings to capture a moment that lasts less than a second. And when you finally nail it, that one shot feels like pure victory.
Shutter Speed—Your Best Friend
When I first picked up a camera, shutter speed was just a number to me. I didn’t really understand what it did or why it mattered. I thought, “As long as I press the shutter, the photo should look fine.” That illusion broke the day I tried to photograph a football match. Every single frame looked like a smear of jerseys, legs, and dust. It wasn’t the players’ fault, and it wasn’t even the camera’s fault—it was mine. I was using the wrong shutter speed.
The moment I discovered that shutter speed actually controls how motion appears in a photo, my entire perspective shifted. If I wanted to freeze a footballer mid-kick, I needed something fast like 1/1000s. But if I wanted to show motion, like a running dog with dreamy background streaks, I could slow it down to around 1/30s and pan with the movement. Suddenly, photography became less about pressing a button and more about making creative choices.

Of course, mistakes were part of the process. Many times, I picked a shutter speed that was too slow, and my subjects looked like ghosts. Other times, I cranked it too high, and the photo turned dark because I forgot about exposure. Each failure taught me something valuable: shutter speed isn’t just technical—it’s storytelling. It decides whether your photo freezes a single split second or shares the feeling of speed itself. And once you master it, you’ll realize why shutter speed truly is your best friend in moving subject photography.
The Autofocus Struggles
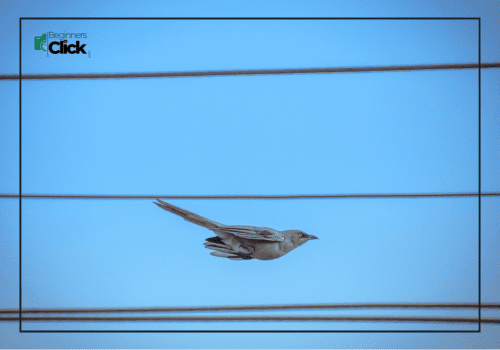
Autofocus sounded simple when I first started photography. Point at the subject, half-press the shutter, and let the camera do the rest—that’s what I believed. But when my subjects started moving, especially birds, the story took a hilarious turn. I’d spend minutes waiting for the perfect moment, and then—click—the camera focused sharply on a tree branch, a random wire, or even a rooftop. The bird? A blurry streak somewhere in the corner of the frame.
At first, I thought maybe I wasn’t holding the camera steady enough. So, I tried harder, pressed slower, even held my breath like a sniper. Still, the autofocus loved everything except the actual bird. It was frustrating, and honestly, a little funny. I felt like my camera had a personal grudge against me.
The breakthrough came when I discovered continuous autofocus (AI-Servo on Canon, AF-C on Nikon/Sony). Instead of locking on one spot and refusing to move, the camera started tracking the subject as it flew across the frame. The first time I saw a bird stay in focus mid-flight, I felt like I had unlocked a secret level in photography.

That day, I learned an important lesson: don’t fight with your autofocus. Understand how it works and let it become your ally. Moving subject photography is already unpredictable—you don’t want your own camera working against you. Once I switched to continuous autofocus, my keeper rate improved dramatically, and those blurry-bird days slowly became history.
The Beauty of Motion Blur
When I first started learning photography, I had one obsession—make everything sharp. If a photo came out even slightly blurry, I saw it as a failure. I’d delete it instantly, convinced that blur had no place in photography. My mindset was simple: sharp equals good, blur equals bad. But over time, I realized I was missing out on one of the most creative tools in moving subject photography—motion blur.
The discovery happened by accident. One evening, I was trying to capture a passing car. I set my shutter speed too slow—around 1/40s—without really thinking about it. To my surprise, when I panned the camera along with the car, the vehicle stayed relatively sharp while the background turned into beautiful streaks of light and color. Instead of looking like a mistake, the photo felt alive, like speed had been painted onto the frame. That so-called “failure” became one of my favorite shots.
From then on, I started experimenting with motion blur intentionally. Runners, cyclists, even street dogs—suddenly they all became subjects for creative panning shots. The blur wasn’t ruining the photo anymore; it was telling a story of movement, energy, and atmosphere.

What I once thought was a flaw turned into an artistic choice. Motion blur taught me that photography isn’t always about freezing reality—it’s about interpreting it. Sometimes, the blur says more about speed and motion than a perfectly sharp frame ever could.
Light, Patience, and Burst Shots
Low light was my biggest enemy when I first tried moving subject photography. Imagine chasing a football game at dusk or trying to capture kids running under streetlights—every photo looked like a noisy mess. To fix it, I did what every beginner does: I cranked the ISO as high as my camera would allow. The result? Photos that looked like they had been sprinkled with sand. Grain everywhere, colors washed out, and details gone. It was heartbreaking, especially after spending hours shooting.
But slowly, I realized the problem wasn’t my camera—it was my approach. Instead of forcing settings to work against the environment, I had to learn to work with the light. Timing became my secret weapon. Shooting during the golden hour, when the sun is low and soft, gave me natural brightness and contrast without pushing my ISO to the sky. Suddenly, my photos looked cleaner, sharper, and more alive.
Then came the unpredictability of moving subjects. Birds flew faster than expected, cyclists swerved, and kids never ran in straight lines. That’s when burst mode became my lifesaver. Instead of relying on one perfect click, I fired a rapid series of shots, increasing my chances of catching that one perfect frame.

The real lesson? Good light, patience, and smart techniques beat “fixing it in settings.” Photography isn’t always about forcing control—it’s about waiting for the right moment and being ready when it comes.
Recommended Gear for Capturing Moving Subjects
1. Sony Alpha a7 III Mirrorless Camera
Why it’s ideal: The Sony Alpha a7 III offers impressive autofocus capabilities, including Eye AF and Real-Time Tracking, making it excellent for capturing fast-moving subjects. Its 24.2MP full-frame sensor delivers high-quality images with excellent low-light performance.
User experience: Photographers have praised the a7 III for its reliable autofocus system and image quality. One user noted, “The autofocus is incredibly fast and accurate, even in challenging lighting conditions.”
2. Canon EOS R6 Mirrorless Camera
Why it’s ideal: The Canon EOS R6 features Dual Pixel CMOS AF II, providing fast and accurate autofocus. Its 20fps continuous shooting speed ensures you can capture fast-moving subjects with ease.
User experience: Users have highlighted the camera’s performance in action photography. One photographer shared, “The R6’s autofocus is a game-changer for sports photography; I never miss a shot.”
3. Nikon Z6 II Mirrorless Camera
Why it’s ideal: The Nikon Z6 II offers 14fps continuous shooting and a 273-point hybrid AF system, making it suitable for capturing moving subjects. Its 24.5MP full-frame sensor provides detailed images.
User experience: Photographers appreciate the Z6 II’s performance in dynamic situations. One user commented, “The Z6 II handles fast action beautifully, and the image quality is top-notch.”
4. Tamron 70-180mm f/2.8 Di III VXD Lens
Why it’s ideal: This lens offers a versatile focal length range and a constant f/2.8 aperture, allowing for excellent subject isolation and performance in low light. Its VXD (Voice-coil eXtreme-torque Drive) autofocus ensures quick and precise focusing.
User experience: Users have praised the lens for its sharpness and autofocus speed. One photographer noted, “The Tamron 70-180mm is incredibly sharp and fast, perfect for action shots.”
5. Sigma 100-400mm f/5-6.3 DG DN OS Lens
Why it’s ideal: The Sigma 100-400mm lens offers a long focal length range, making it suitable for wildlife and sports photography. Its Optical Stabilizer (OS) helps reduce camera shake, and its Super Multi-Layer Coating minimizes flare and ghosting.
User experience: Photographers have found this lens to be a great value for its performance. One user shared, “The Sigma 100-400mm delivers sharp images and is a great alternative to more expensive lenses.”
6. Manfrotto MT190XPRO3 Aluminum Tripod
Why it’s ideal: A sturdy tripod is essential for capturing sharp images, especially in low light. The Manfrotto MT190XPRO3 offers a versatile center column mechanism and robust build quality.
User experience: Users appreciate the tripod’s stability and ease of use. One photographer commented, “The Manfrotto MT190XPRO3 is incredibly stable and easy to set up, even in challenging conditions.”
7. Peak Design Capture Camera Clip v3
Why it’s ideal: The Peak Design Capture Camera Clip allows you to securely attach your camera to your backpack strap, belt, or bag strap, providing quick access while keeping your hands free.
User experience: Photographers find this accessory invaluable for travel and outdoor shoots. One user shared, “The Capture Clip is a game-changer for hiking and traveling; it keeps my camera secure and accessible.”
8. SanDisk Extreme Pro 128GB SDXC UHS-I Memory Card
Why it’s ideal: High-speed memory cards are crucial for continuous shooting and video recording. The SanDisk Extreme Pro offers fast read and write speeds, ensuring you don’t miss any action.
User experience: Users have praised the card’s reliability and performance. One photographer noted, “The SanDisk Extreme Pro never lets me down; it’s fast and durable.”
9. Rode VideoMic Pro+ Compact Directional On-Camera Microphone
Why it’s ideal: For videographers capturing moving subjects, clear audio is essential. The Rode VideoMic Pro+ offers high-quality directional audio capture and features automatic power on/off.
User experience: Users have highlighted the microphone’s sound quality and ease of use. One videographer shared, “The Rode VideoMic Pro+ delivers crisp, clear audio and is easy to mount on my camera.”
Link: Rode VideoMic Pro+ Compact Directional On-Camera Microphone
10. Lowepro ProTactic 450 AW II Camera and Laptop Backpack
Why it’s ideal: A durable and comfortable backpack is essential for photographers on the move. The Lowepro ProTactic 450 AW II offers customizable compartments and weather-resistant materials.
User experience: Photographers appreciate the backpack’s design and functionality. One user commented, “The ProTactic 450 AW II is spacious, well-organized, and comfortable for long shoots.”
Link: Lowepro ProTactic 450 AW II Camera and Laptop Backpack
Quick Tips for Beginners
When you’re just starting out with moving subject photography, the technical stuff can feel overwhelming. But the good news is, you don’t need a hundred rules—just a handful of smart habits that make shooting easier and more fun. Here are ten beginner-friendly tips that helped me the most:
- Start with a fast shutter speed – Freezing motion is easier when your shutter is at 1/500s or faster.
- Experiment with panning – Slow the shutter (1/30–1/60s) and move your camera with the subject to capture motion blur creatively.
- Use continuous autofocus (AI-Servo/AF-C) – This keeps your subject in focus even as it moves across the frame.
- Switch to burst mode – One shot may fail, but a burst of 5–10 shots increases your chances of getting a keeper.
- Stay patient – Action won’t always happen when you’re ready, so wait for the right moment.
- Track the subject early – Don’t wait until the last second. Follow your subject through the viewfinder before pressing the shutter.
- Practice in bright light first – Good lighting makes it easier to use faster shutter speeds without worrying about ISO noise.
- Learn to anticipate movement – Athletes, pets, or vehicles usually give clues before moving—watch carefully and predict the action.
- Keep both eyes open – One eye in the viewfinder, the other aware of the surroundings. This helps when subjects enter or leave the frame suddenly.
- Review and learn from mistakes – Don’t delete blurry shots right away. Look at them, figure out what went wrong, and adjust next time.
These aren’t just technical tricks—they’re habits that make you more confident and prepared. The more you practice them, the fewer shots you’ll miss, and the more your photography will feel natural instead of forced.
Embracing the Imperfection of Action Shots
Even after years of practice, I still mess up. A footballer suddenly sprints faster than expected, a bird changes direction mid-flight, or a motorbike zooms out of the frame too soon. But that’s what makes moving subject photography so addictive—it keeps you on your toes.
I used to get frustrated with blurry photos, thinking I was failing. Now I see them as part of the process. Every mistake tells me something new—whether it’s about timing, focus, or creativity. Slowly, those blurry failures turned into sharp, powerful images that tell stories.
If you’re just starting, don’t be afraid of mistakes. They’re your stepping stones. With every blurred frame, you’ll get closer to capturing that perfect moment. And when you finally freeze a footballer in mid-air or a bird in full flight, you’ll realize it wasn’t about perfection—it was about persistence.
Moving subject photography is more than a technique—it’s a journey. One where failure, patience, and experimentation come together to create moments that feel alive. And when you finally master it, trust me, every photo will tell a story of not just your subject, but your growth as a photographer.
FAQ: Moving Subject Photography
Moving subject photography involves capturing subjects that are in motion, such as people running, vehicles, or animals. The goal can be to freeze the action or creatively show movement using techniques like motion blur.
It depends on your goal. For freezing action, use a fast shutter speed (1/500s or higher). For motion blur, slow it down (1/30–1/60s) and pan with the subject.
Continuous autofocus (AI-Servo/AF-C) is ideal for unpredictable moving subjects. Manual focus works for slower or predictable movement, but autofocus usually gives better results.
Panning is a technique where you move your camera along with the subject during exposure. It keeps the subject sharp while creating a blurred background that conveys speed.
Burst mode is perfect for fast action. It allows you to take multiple frames in quick succession, increasing your chances of capturing the perfect moment.
Shoot during golden hour or in well-lit areas, and adjust ISO carefully. Using a tripod or stabilizer can also help reduce blur from slow shutter speeds.
Absolutely! Motion blur can make a photo feel dynamic and artistic, showing the speed and energy of the subject rather than freezing a single moment.
Watch the subject’s movement patterns, study their behavior, and predict where they will go. This is especially helpful for sports, wildlife, or street photography.
Not necessarily. While advanced cameras help, understanding shutter speed, autofocus, and composition will improve your results far more than gear alone.
The most common mistake is relying on luck instead of preparation—wrong shutter speed, incorrect focus, or poor timing. Practicing techniques and learning from mistakes is the key to improvement.

