“Macro photography for beginners” is an exciting journey into the world of capturing tiny details. When I first started with macro photography, I was completely clueless. I remember staring at a tiny flower or a busy spider and thinking, ‘I wish I could capture all the details in a photo.’ But back then, there was no one to guide me, and I faced countless struggles. I thought to myself, ‘If only I could make this easier for others.’
And that’s exactly why I’m here: to share my step-by-step journey with you. This guide is built from my own experiences, the mistakes I made, and the lessons I learned along the way. So, if you’re interested in diving into macro photography for beginners, let’s jump right in and explore this fascinating world together.
Table of Contents
ToggleStarting Your Journey in Macro Photography: My Personal Experience and Step-by-Step Guide
Have you ever looked at a tiny flower bud or a busy spider and wished you could capture all its intricate details in a photo? That’s where macro photography comes in! It’s the art of taking super close-up pictures that make small things look BIG and reveal a whole new world hidden right in front of us.
The very first time, when I tried to take macro photographs, I was blind to macro photography; there was nothing to help me. At that time, I faced many problems and decided to write a detailed article about macro photography. This is my step-by-step macro photography guideline, which can help anyone to start macro photography. If you are interested in macro photography, let’s move on to the next…
So, how does macro photography work?
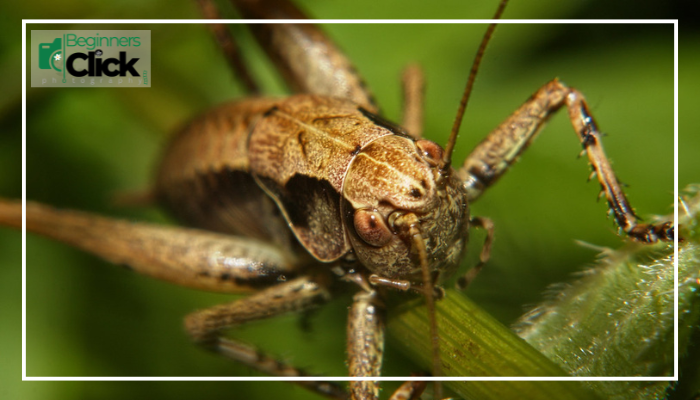
So, how does macro photography work? Imagine you’re holding a magnifying glass over an ant. You can see its tiny legs, the fine details on its body, and every little feature that’s often hidden from the naked eye. Now, that’s exactly what macro photography does, but with your camera. It allows you to focus on subjects much closer than a regular camera would allow.
Instead of just snapping a picture of something from a distance, macro photography lets you zoom in on the smallest details – like the intricate veins of a leaf, the delicate texture of a flower petal, or even the tiny hairs on an insect’s body. What was once too small to notice becomes larger than life in your photos, almost as if you’re stepping into a completely different world.

It’s like being a detective, exploring a hidden universe that’s all around you but often goes unnoticed. With macro photography, you don’t just take photos – you capture the magic that’s right under your nose, bringing the smallest, most fascinating details into sharp focus.
Why try macro photography?
So, why should you even consider diving into the fascinating world of macro photography? What makes it stand out from other types of photography? Well, the truth is that macro photography draws photographers in for all kinds of reasons. For some, it’s the thrill of capturing the tiniest details that are often overlooked. For others, it’s the chance to explore a completely different perspective of the world. Macro photography speaks to different creative sensibilities—it’s not just about taking a picture, it’s about discovering and revealing the hidden beauty that’s all around us.
Whether you’re someone who loves to challenge yourself, express your creativity in new ways, or simply appreciate the little things in life, macro photography offers something special. It’s the kind of photography that invites you to slow down, look closely, and get lost in the tiny worlds that we often miss. And the best part? You don’t need to be a professional to get started—macro photography is something anyone can pick up and enjoy.
So, if you’ve ever wondered what makes macro photography so unique and why so many photographers are drawn to it, let me show you the magic behind the lens and why it might just be the perfect fit for your next creative journey.
Revealing Hidden Worlds:
Macro photography lets you uncover the unseen beauty in everyday objects. It reveals intricate details that usually go unnoticed, like the delicate veins in a leaf or the subtle texture of a flower petal. It’s like opening a door to a hidden world where tiny creatures and mesmerizing patterns exist, right in front of our eyes. With macro photography, the ordinary transforms into the extraordinary, offering a new perspective on the world around us. What seemed insignificant becomes fascinating, allowing you to appreciate the small wonders that nature has to offer.

Creative Exploration:

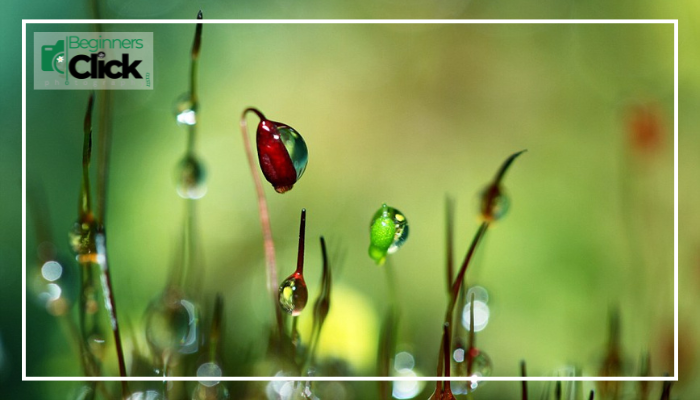
Macro photography completely changes the way you see the world around you. It pushes you to experiment with new perspectives, lighting setups, and focus points, allowing you to capture things in ways you’ve never imagined. The beauty of macro is that it turns ordinary objects into something extraordinary. Whether it’s the veins of a leaf, the delicate dewdrops on a spiderweb, or the subtle textures of everyday items, macro photography invites you to explore creativity, transform simple moments into abstract art, and discover beauty in the most unexpected places.
A Challenge to Master:
Macro photography isn’t easy; it requires a solid understanding of focus, depth of field, and lighting control. The tiniest shift in focus can make or break a shot. It’s a technical challenge that pushes you to hone your skills and experiment with various camera settings. You’ll need to be patient, precise, and adaptable, constantly adjusting your approach to capture the perfect image. But that’s what makes macro photography so rewarding – the more you practice, the better you get, and mastering it feels like conquering a whole new world of photographic possibilities.

Stunning Visuals:

The results of macro photography can be truly mesmerizing. Taking a tiny subject and transforming it into a larger-than-life image full of intricate details is both challenging and rewarding. The beauty of macro photography lies in its ability to highlight features that would otherwise go unnoticed, turning the smallest things into captivating visual stories. Whether it’s a bug, a flower, or even a raindrop, macro photos bring an added sense of depth and wonder. These stunning visuals can give your portfolio or social media feed a unique and striking touch, drawing the attention of anyone who sees them.
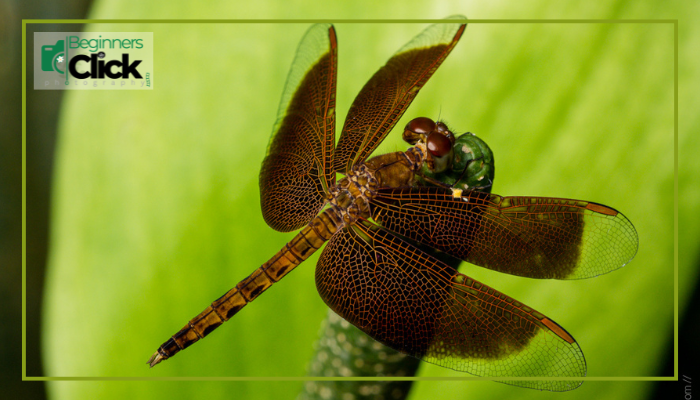
Appreciation for the Small:
Macro photography deepens our appreciation for the beauty and complexity of the world around us. It encourages us to look closely at the often-overlooked details of nature, from the texture of a leaf to the delicate wings of an insect. With macro, we connect with nature on a more intimate level, seeing things in a way that isn’t possible with the naked eye. It helps us marvel at the intricate patterns and structures that exist in the smallest of things, reminding us of the hidden wonders of the natural world that we often miss.

Subject Availability:

Unlike landscape or wildlife photography, where you often need to travel far and wide to find great subjects, macro photography lets you discover beauty right where you are. Whether it’s your backyard, garden, or even your home, there’s a whole world waiting to be explored with just a close-up lens. Tiny insects, flowers, or the intricate textures of everyday objects become fascinating subjects, all within arm’s reach. This makes macro photography not only convenient but also an exciting way to connect with the world around you, no matter where you are.
Ultimately, the reasons for choosing macro photography are as diverse as the photographers themselves. It can be a way to express creativity, challenge yourself technically, or simply appreciate the beauty in the little things.
Macro Photography Tips for Beginners:

Gear Up (a Little):
Macro photography doesn’t require expensive gear to start. In the beginning, using simple, affordable equipment keeps costs low while you learn. Once you’re comfortable, you can upgrade your gear as needed. Here’s what you can use to get started:
- Your Existing Camera: Most digital cameras, even basic ones, can capture close-up shots. There’s no need to invest in high-end equipment right away.
- Close-Up Filter: This screw-on filter allows you to focus closer than usual, providing an affordable entry point into macro photography.
Extension Tubes: These tubes fit between your camera and lens, enabling you to focus even closer, revealing finer details that make your photos stand out.
Embrace Manual Mode:
Although auto mode can be convenient, switching to manual settings provides greater control over your shots. Start by focusing on getting a sharp image. Once you’re comfortable, experiment with the aperture to control the blur in the background, and adjust the shutter speed to manage the brightness of the image. Mastering manual mode allows you to create more dynamic, professional-looking photos as you gain experience and refine your skills.
Light is Key:
Natural light is essential in macro photography, as it provides soft, even illumination that enhances the fine details of your subject. Look for a well-lit area with diffused light, such as near a window, to avoid harsh shadows. If you’re shooting indoors or in low-light conditions, using a flash with a diffuser can help soften the light, creating a more flattering and balanced effect. Proper lighting brings out the textures and details of your subject, making your photos look sharp and vibrant.
Focus on Stability:
When working at close distances, even the slightest camera movement can result in blur. To avoid this, use a tripod to keep your camera steady, ensuring sharp, clear images. If you don’t have a tripod, find a stable surface like a table or wall to rest your camera on. This will minimize any unwanted motion and help you capture precise, detailed shots. Stability is key to achieving professional-looking macro photos, especially when shooting at extreme close-up distances.
Fill the Frame:
To truly capture the details of your subject, get as close as possible. Don’t be afraid to experiment with different angles—shoot from above, below, or straight-on to find the most interesting perspective. Filling the frame with your subject helps highlight the fine details, making it the focal point of the image. By exploring various angles, you can add depth and creativity to your photos, turning simple subjects into captivating works of art.
Focus on the Details:
Use the depth of field preview button (often marked with a flower symbol) to see which parts of your image will be in focus. This feature helps you visualize how much of the subject will appear sharp and ensures that the most important details are crisp. By adjusting the focus, you can highlight the key elements of your subject, making sure that the most interesting or captivating features stand out clearly in your shot. This is especially important in macro photography, where precision is key.

Macro Photography for Beginners: 7 Magical Step
Step 1 – Find a small subject – a flower, insect, or even a raindrop on a leaf.
Step 2 – Set up your camera on a tripod (or stable surface) and switch to manual mode (if comfortable).
Step 3 – Attach your close-up filter or extension tubes (if using).
Step 4 – Position your camera close to the subject, filling the frame as much as possible.
Step 5 – Use the depth of field preview to ensure the most interesting details are sharp.
Step 6 – Adjust your aperture and shutter speed to get a clear, well-exposed image.
Step 7 – Take lots of photos and experiment with different angles and lighting!

Bonus Tip:
Macro photography is the perfect excuse to explore your backyard or local park. You’ll be amazed at the hidden wonders waiting to be discovered up close! From tiny insects to intricate flower petals, there’s a whole world of details right around you. So, grab your camera, step outside, and start capturing the beauty that often goes unnoticed in the everyday surroundings. You’ll find endless subjects just waiting to be photographed!
Lenses for Macro Photography
While there are specific macro lenses designed for ultimate close-up detail, you can definitely achieve macro photography with various lens options that beginners might already have! Here’s a breakdown:
Macro Lens
Close-Up Filters
Extension Tubes
Reverse Lens Technique
Macro Lens:
An ideal choice for macro photography: These lenses are specifically designed for capturing extreme close-up shots with a 1:1 magnification ratio (meaning the subject is reproduced on the sensor at its actual size) or even higher.
Benefits: They offer the best image quality, highest magnification, and closest focusing distance for macro work.
Close-Up Filters:
An affordable option for beginners: These screw-on filters attach to the front of your existing lens and allow you to focus closer than usual.
Benefits: Relatively inexpensive and easy to use. Good for getting started with macro photography.
Limitations: May cause some image quality degradation and reduce the amount of light reaching the sensor.


Affordable alternative: These hollow tubes fit between your camera body and lens, effectively increasing the magnification.
Benefits: More affordable than macro lenses and offer good image quality. Allow for various levels of magnification depending on the extension tube length.
Limitations: Can introduce slight image quality loss and may block autofocus on some cameras.
Reverse Lens Technique:
Creative and budget-friendly: This involves physically mounting your lens in reverse on the camera body (requires an adapter).
Benefits: Very affordable way to achieve macro effects.
Limitations: Requires additional equipment (adapter), can be fiddly to set up, and often loses autofocus and automatic aperture control.

Beginner's Recommendation:
For beginners, a close-up filter or extension tubes are great options to experiment with macro photography before investing in a dedicated macro lens. They’re affordable and allow you to see if you enjoy the close-up world before taking the plunge.
Exploring Lighting Patterns in Macro Photography
In macro photography, harsh light with strong shadows can be unkind to your tiny subject, often masking the delicate details you’re trying to capture. Understanding lighting patterns is essential for creating well-lit, balanced images. Here are some key things to know about lighting for macro photography:
Soft, Diffused Light is King:
Natural Light:
In macro photography, soft, diffused natural light is ideal. On cloudy days or in shaded areas, the cloud cover works as a giant diffuser, softening the sunlight and providing even, flattering illumination for your subject. This type of light brings out the intricate details in your close-up shots without casting harsh shadows, resulting in a natural, well-balanced look. It’s perfect for capturing the true beauty of tiny subjects, allowing them to shine in their full detail without overpowering contrasts.


Diffused Flash:
When you need to use artificial light, a flash with a diffuser is an excellent choice. The diffuser scatters the light, softening harsh shadows and giving your subject a more natural, even look. You can achieve this effect with tools like a softbox, umbrella diffuser, or even a simple white sheet placed in front of your flash. Using diffused flash ensures your subject is illuminated evenly, creating a smooth and professional appearance in your macro photos, without the harshness that direct flash can cause.
Lighting Patterns to Consider:
Front Lighting:
Front lighting is a basic lighting setup where the light source, whether natural or flash, is positioned directly in front of your subject. This setup works well for capturing the fine details of flat objects, as it provides even illumination across the surface. However, it can sometimes flatten the dimensionality of your subject, making it appear less three-dimensional. While front lighting ensures that your subject is fully lit, it may not highlight textures or shadows as effectively as side or backlighting, so it’s best used for simple, two-dimensional subjects.


Side Lighting:
Placing the light source at an angle, either from the side or slightly behind your subject, can create more dramatic lighting with defined shadows. This technique enhances depth and texture, adding a three-dimensional feel to your macro photos. By casting shadows along the edges of your subject, side lighting brings out intricate details that may otherwise go unnoticed, such as the veins of a leaf or the fine hairs on an insect. It’s perfect for showcasing the texture and structure of your subject while adding a more dynamic, layered effect to your images.
Backlighting:
Positioning the light source behind your subject creates a beautiful rim light effect, highlighting the edges and giving your subject a glowing, ethereal look. This technique works especially well for translucent subjects like leaves, petals, or insects’ wings, as it emphasizes their delicate structure. However, be cautious not to completely blow out the highlights, as the light can overwhelm the details of the subject if it’s too intense. To control this, use a diffuser or adjust the exposure to ensure the subject remains visible while still achieving that soft, glowing outline.

Multiple Light Sources:
As you become more comfortable with macro photography, experimenting with multiple light sources can add complexity and depth to your images. Using more than one light allows you to create sophisticated lighting patterns, highlight specific features, and introduce dramatic effects. For example, you can use one light for general illumination and another to accentuate particular details, such as the texture of a petal or the fine hairs on an insect. By carefully positioning these lights, you can control shadows and enhance the three-dimensionality of your subject, resulting in more dynamic and visually striking macro photos.
Experimentation is Key!
The best lighting pattern for your macro shot depends on the specific subject and the effect you’re trying to achieve. Don’t be afraid to experiment with different lighting setups to see what works best for you. Remember, soft, diffused light is the foundation, and then you can use different lighting patterns to add depth, drama, or other creative effects to your macro photos.

Supporting Equipment
Beyond the lens options you covered previously, other equipment considerations for macro photography can enhance your results:

Lighting:
- Natural Light: Soft, diffused natural light is ideal for macro photography. You can find this on cloudy days or in shaded areas.
- Flash with Diffuser: If using artificial light, a flash with a diffuser helps avoid harsh shadows and creates softer lighting on your tiny subject.

Stability:
- Tripod: Extremely important for macro photography because even minor camera shake can be magnified and cause blur in your close-up shots. A tripod ensures stability and allows you to use slower shutter speeds for better low-light performance.
- Beanbag: A beanbag can be a versatile tool for macro photography. You can mold it to create a stable platform for your camera on uneven surfaces or use it to prop up your camera at different angles.
Focus Aids:
- Macro Rail: This geared rail allows for precise focusing adjustments, especially helpful when the depth of field at high magnification is very shallow.
- Focus Stacking: A technique where you capture multiple images at slightly different focus points and then combine them in post-processing software to achieve a larger area of sharpness in your final image.

Optional Equipment:
- Remote Shutter Release: Minimizes camera shake even further by eliminating the need to touch the camera when taking the picture.
- Ring Light: Provides continuous, even lighting around your subject, often used for studio macro photography.

Remember, you don’t need all this equipment to start. Experiment with what you have and see what kind of macro results you can achieve!
Macro photography opens a door to a world of wonder hidden right in plain sight. With a little creativity and some basic techniques, you can capture stunning close-up images that reveal the intricate details of everyday objects and tiny creatures. Whether you’re looking for a new creative outlet, a challenge to hone your skills, or simply a way to appreciate the beauty in the small things, macro photography is a rewarding pursuit for photographers of all levels. So grab your camera, get close, and start exploring the magical world of macro!